Islands Player Handbook
Everything about how Islands works: from your first login over buying and building your own island to enemies, guardians, the player-driven economy and how payments on Solana keep your money safe.
What's new The Trials Update
Extraction Runs now start with 2 players and every item chance inside a run is 10% higher than anywhere else (see Extraction Run). In The Abyssal Trials you now get three lives: the fourth death ends your run unless you take the one-time buy-back for 15,000 $Islands, and a full wipe no longer revives bosses you already killed.
The gacha skin pool rotated: 3 new hats and 3 new character makeovers are winnable, the previous twelve are retired for good (see Equipment & the Blacksmith). And everything that used to say "burn" now says spend - same costs, same odds; the Tokens Spent leaderboard and the Tome Transfer action are the two renames worth knowing.
Rarity rebalance: every Mythic drop chance is halved (boss gear rolls 1% to 0.5%), while the Blacksmith gacha only drops 25% to 0.375% and combining 3 Epics drops from 10% to 5%. Upgrade materials drop 15% less often, and Mythic materials take both cuts (see Upgrade materials). The post-run Loot claimed list now groups materials into one expandable line instead of a page of rows.
What is Islands?
Islands is a top-down multiplayer building and adventure game on Solana. The world is one shared 500 × 500 tile ocean that every player sees live: islands, builds, heroes, guardians and enemies are simulated by an authoritative server and streamed to everyone in realtime.
You buy a piece of the ocean with USDC, raise it into your own island with multiple walkable elevation levels, gather resources, fight the enemy hordes that roam every island, hire guardians and trade with other players on a fully player-to-player market.
Connect & play
On the start screen you have two ways in:
- Connect Wallet: Phantom, Solflare or Backpack. You sign one short message to prove the wallet is yours (no transaction, no cost). Your hero, name, inventory, XP and islands are tied to this wallet.
- Set sail as guest: explore the whole world and watch other players without a wallet. Guests cannot buy land, build or trade.
With a valid session you get a Continue playing button. It only works while the wallet in your extension matches the session (see Wallet & session security). Only one session per wallet can be online at a time; connecting elsewhere disconnects the old session. You can log out any time via Settings → Log out.
Your hero
Every player is a pawn hero in a wallet-bound color, with your name and a gold level badge above the head, visible to everyone. Your hero swings an axe to fight and harvest, levels up with stat points (see Levels & stats) and picks a unique name (2 to 16 characters) on first login.
Walk off any coast and your hero hops into a boat automatically and sails the ocean. Step back on land and the boat disappears. Guardians following you get their own boats. You can even fight from the water.
Starter area (level 1 to 14)
New heroes begin in a protected starter area: the main island surrounded by its own named islands. Enemy packs roam, patrol and even hop between islands exactly like in the Overworld. Island levels scale with distance: level 1 right around the main island, up to level 10 on the two outermost islands. The dangerous high level islands of the Overworld do not exist there, so you can quest, fight and gather in peace. Everything else works as usual: quests at the Seer, the merchant and blacksmith on the main island, raids, pets, fishing and gold mining (from level 10). Everything you gather there comes from real Overworld nodes: gold, trees and fishing spots mirror real nodes, so island owners still earn their share.
Want out early? Talk to Warmaster Bram: below level 15 you can travel to the Overworld any time and come back, but be careful, it is really hard out there. Players at level 15 and above can visit the starter area through Bram to look around, but cannot fight or gather there. Traveling between the two worlds has a 15 second cooldown, so you cannot hop back and forth instantly.
On your very first spawn you pick your starter gear: one common weapon, armor and pair of boots of your choice, equipped right away. Each piece carries a starter bonus of +30 to its stat (STR on the weapon, VIT on the armor, AGI on the boots) for 3 days. Hover any gear piece to see the bonus and how long it lasts.
When you reach level 15 you are moved to the Overworld automatically and permanently. That is where land buying and building unlock; until then the Build and Buy Land buttons stay hidden.
Controls
| Action | Desktop | Mobile |
|---|---|---|
| Move | WASD / arrow keys, click to move, or hold the left mouse button to walk toward the cursor | Invisible joystick: touch anywhere and drag (360°), or tap to walk there |
| Attack / harvest | Click an enemy, tree or gold node to lock on. Your hero walks over and swings automatically. Or hold the attack button. | Tap a target to lock on, or hold the attack button (bottom center) |
| Quick slots | Press 1-9 to use the assigned slot: potions, emotes or your home teleport (self heal sits on 1 by default) | Tap the slots at the bottom left |
| Camera | Mouse wheel zoom, drag to pan | Pinch to zoom, two-finger drag to pan |
| Map | Minimap top right: click = travel there, right-click = look, hover = coordinates | Map button in the HUD stack, tap the map to travel there |
Click another player to inspect their profile (level, kills, inventory). The HUD bottom right holds the Island, Hero, Market, Chat, Backpack and Settings buttons. Every panel can be dragged by its title bar to wherever you like, and the position is saved on your device.
The world map
The world map is fully interactive. Click or tap anywhere on it and your hero travels there on foot or by boat, automatically pathing around cliffs and buildings, across the whole world if needed. While you are on the way the map shows your position (You: x · y), the target tile (Walking to x · y), a pulsing green marker and a dashed route, so you can watch your dot travel. The map stays open while you walk; the readout disappears on its own when you arrive or take over manually, and moving by hand or joystick cancels the trip.
On desktop, hovering the map shows a crosshair with the tile coordinates under the cursor, and a right-click peeks the camera at a spot without moving your hero. Every living world boss appears as its own colored marker: Bear amber, Minotaur red, Arcane Horror purple, Kraken teal and Black Bull black. Hover a marker to see the boss name, and on the large map every marker shows the creature icon itself inside its colored ring.
Two handy options live under Settings (the cog). Tap priority decides what a tap or click locks onto when an enemy and another player overlap: keep it on Enemies (the default) so you never pop open a player panel by accident while swinging in a boss pack, or switch to Players when you want to inspect people. You can also block any player from their profile or from a chat message: a blocked player's chat is hidden for you, and you can unblock them again from the block list in Settings. You cannot block yourself. Under Settings > Interface you can also hide other players' pet effects and other players' skill effects - each toggle removes both the visuals AND the sounds of everyone else, while your own effects always stay on. Great for busy boss fights.
Chat: while the chat window is closed, the chat button shows a yellow counter with the number of new messages (public chat, and group chat while you are in a raid or an Extraction
Run), so you never miss a conversation. Inside the chat, the Raid tab shows its own
unread counter when teammates write while you are on another tab, and players inside an
Extraction Run get their own Extraction tab with the same group chat. Whispers (private messages) survive a logout: the server keeps them for 24 hours (or until a server restart), so your threads are restored the next time you
log in. Every chat line shows the sender's  renown star (hover it for their renown title and level) plus an
  admin badge and a
  moderator shield,
in every tab including whispers. Each message also shows its age (3s, 2m, 1h). The
moderator shield,
in every tab including whispers. Each message also shows its age (3s, 2m, 1h). The  friends list sorts online friends first and shows each friend's renown star, level and
current activity (On the Islands, Early Isles, In Raid, In Extraction). Offline friends show when
they were last seen.
friends list sorts online friends first and shows each friend's renown star, level and
current activity (On the Islands, Early Isles, In Raid, In Extraction). Offline friends show when
they were last seen.
Customizable HUD
The whole on-screen interface is yours to arrange. Open Settings and tap Customize HUD, pick a category, and edit mode starts: drag any element to move it, grab its corner to resize, then Save (or Cancel, or Reset the active category back to its default spot). Your layout is stored on your device, and phone and desktop layouts are remembered separately. On phones the attack and skill buttons sit above the hotkey row by default so the two groups never overlap, and the big status trackers (raid and Extraction banner, War Ledger) start collapsed as small pills - every collapsed pill can be dragged to any spot without entering edit mode. Under Settings, Interface you can also turn off the damage flash (the brief red screen tint when you take a hit) - your hero still hops on hit, so the feedback never fully disappears.
| Group | Movable elements |
|---|---|
| Buttons & player | Island, Chat, Hero, Market, Equipment, Backpack, Settings, Map button, minimap, health bar, island bar, EXP banner |
| Banners | News ribbon, boss-spawn banner, loot/drop toast, global announcement ribbon |
| Hotkeys | Attack / chop button, quick slots 1-9 |
UI scale
Under Settings > Interface the UI Scale stepper resizes the whole interface at once - every panel, banner, the chat, buttons and tooltips - in steps of 80%, 90%, 100%, 110%, 125% and 150%. The game world itself is never scaled, only the interface on top of it. The setting applies instantly, no reload needed, and is saved on your device. On very large screens (2200 px wide and more) the default is 125%, shown as Auto in the settings, until you pick a value yourself.
Interface hotkeys
Every big panel opens and closes with its own key: B Backpack, C Chat, H Hero, G Equipment, V Marketplace, I Island, M Map and O Settings. All of them are rebindable under Settings > Game > Interface Hotkeys: click a key, press the new one (Backspace removes a binding). Keys 1-9, Space, WASD and Escape stay reserved for combat and movement, and hotkeys never fire while you are typing in a text field. Escape closes only the topmost open window - press it again for the next one - and clicking any open panel brings it to the front and makes it the next Escape target.
Audio
The game is fully voiced with sound: hits, chopping, mining, forging, the market, your boat, footsteps and every skill and pet ability have their own effects. The ambience is layered: the sea is always softly present, grassland sounds join on land and the water takes over out on the waves. In Settings, Audio you control five independent channels, each with its own mute toggle and volume slider: Sounds, Pet Sounds (abilities of yours and nearby players' pets), Skill Sounds (skill tome casts), Ambience and Music.
Buying land
Open the Buy tool and drag a rectangle over free water. The selection shows live whether the area is available and what it costs:
- 1 tile = 1 USDC. A 10 × 10 island costs exactly 100 USDC.
- Up to 5,000 tiles per purchase.
- Keep at least 2 tiles of distance to islands owned by other players. Your own parcels can touch, so you can grow your island in stages.
Confirming opens your wallet with a single USDC transfer on Solana mainnet (see USDC payments for why you don't need any SOL). The purchase is atomic on the server: nobody can buy the same spot at the same time. Your island appears instantly for everyone, and you can name it in the island panel (2 to 24 characters).
Grouping islands
Own several parcels? The Build mode has a merge tool that combines them. Two ways:
- Group Islands (free): touching parcels keep their shapes but share one name and one island level from then on. The game treats the group as a single big island, so enemy spawns, boss eligibility and guard slots count the combined size. Grouped islands are tinted teal in the merge tool.
- Fill Gap and Merge: parcels that almost touch? Buy the missing water tiles in between (1 USDC each) and merge everything into one solid island in a single step.
Building
On your own land the Build mode unlocks a full editor palette:
- Ground: 19 surfaces painted per tile with auto-tiling - five grass tones, sand, and thirteen special surfaces: Cobblestone, Wood Planks, Gravel, Farmland, Flower Meadow, Dirt Path, Pebble Beach, Forest Floor, Shell Sand, Coral, Jungle Floor, Dark Sand and Bamboo Deck.
- Elevation: stack multiple walkable levels with stone cliffs; stairs connect the levels (raised ground needs its cliff base on your own land).
- Bridges: placeable on water only, walkable like land.
- Fences and walls: wooden fence and stone wall. Both auto-connect into rails, corners and posts and block movement.
- Nature & decorations: trees, bushes, rocks, props and buildings.
- Large buildings occupy 2x1 or 2x2 tiles (shown by the green placement preview) and cannot be walked through. Shipwreck and Fishing Pier can also be placed on water tiles inside your island.
Some placements cost resources. Removing a tree refunds half its wood; nodes are not refunded:
| Placement | Cost | Removal refund |
|---|---|---|
| Tree | 25 wood | 12 wood |
| Gold node | 50 gold | none |
| Diamond node | 1,000 gold | none |
| Deco building (no buff) | free | none |
| Buff building | its level 1 price (see the buffs table below) | none |
| Everything else | free | none |
Save writes your build to the shared world so every player sees it. You can only ever build on tiles you own; everything is validated server-side.
- Replace protection: placing something on a spot that holds a paid object (tree, gold or diamond node, fishing spot, hatching field, buff building) asks for confirmation first - no more losing a 1,000 gold diamond node to a stray tap.
- Move tool: relocate anything you placed for free - tap the object to pick it up, tap a free spot to set it down. Upgraded buildings keep their level, and resource nodes (trees, gold, diamond, fishing spots) carry their mining progress and owner reserve with them. Only the race station is tied to its spot (its tracks live there). A hatching field with eggs still inside cannot be moved or removed until they are claimed.
- Hide the palette: the arrow button next to Save collapses the palette sheet - handy on phones for more building space; the tool row stays available.
Buildings
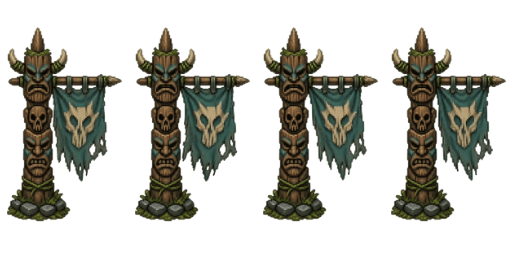
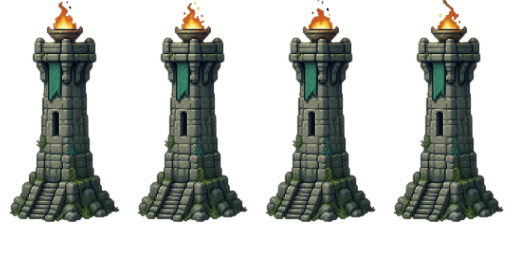
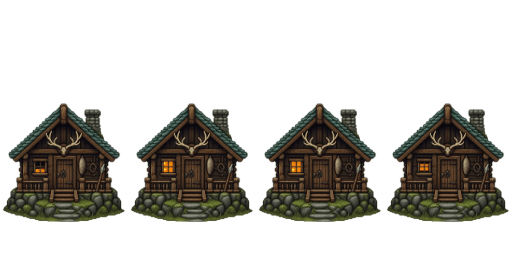
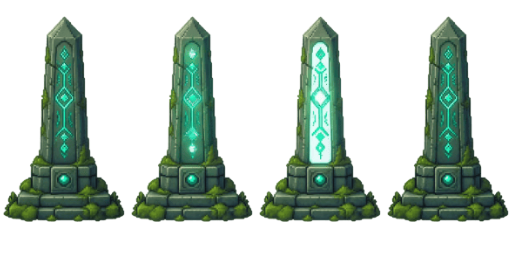
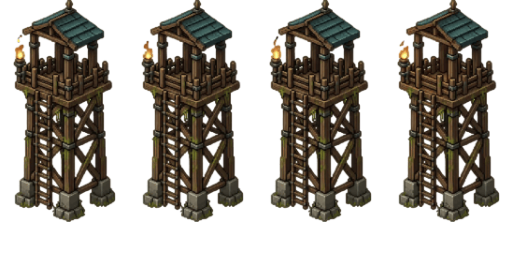
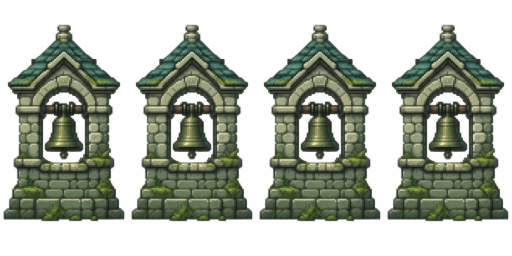
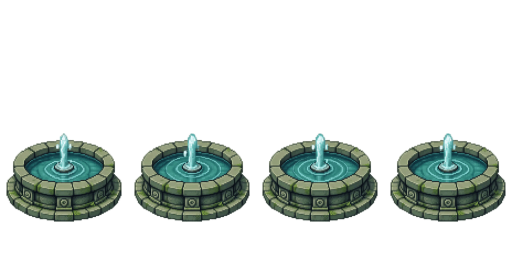
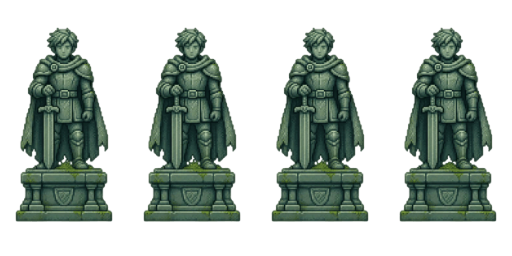
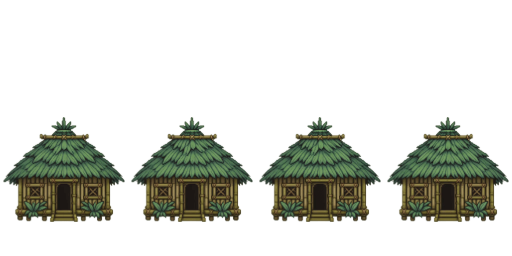
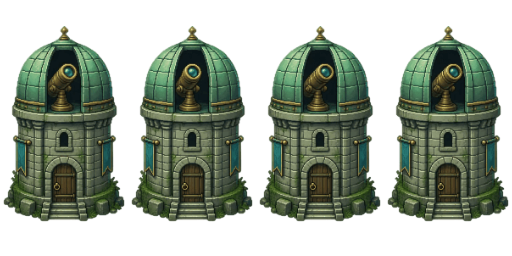
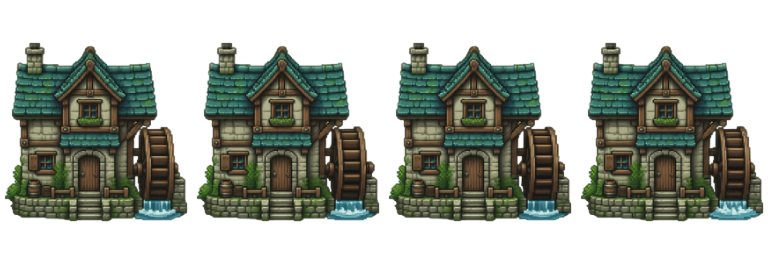
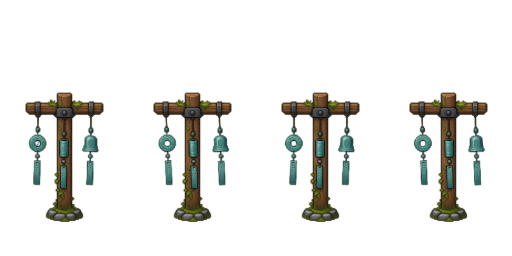
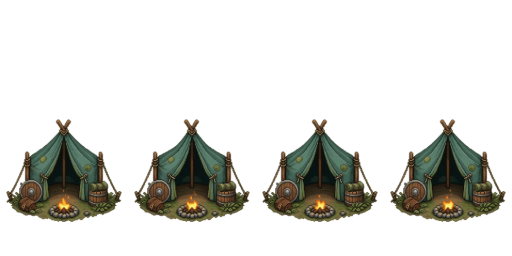
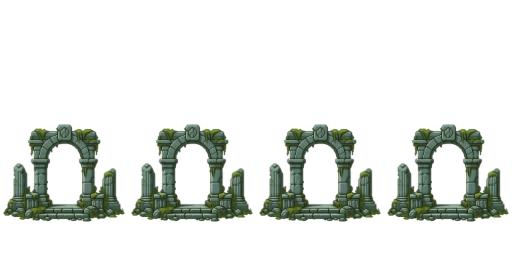
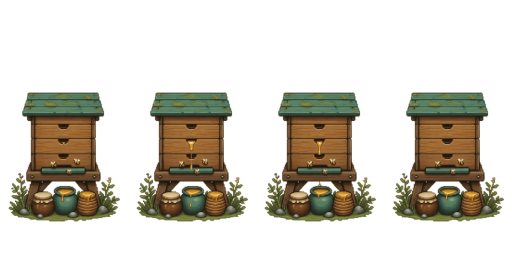
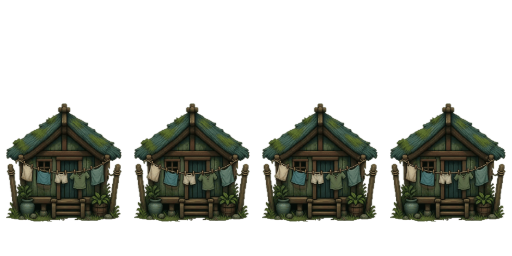
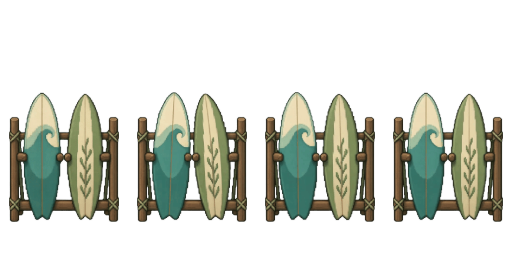
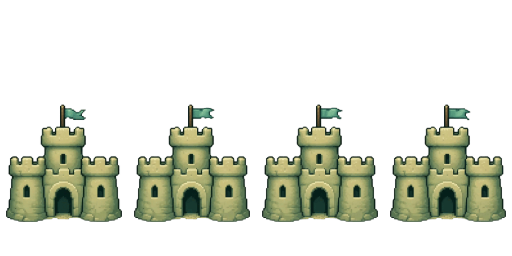
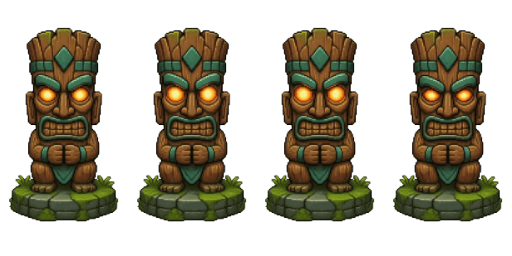
Buildings are decoration with collision (enemies and players walk around them). Place them to give your island character. The newer buildings are animated with subtle idle details like smoke, waving flags and glowing embers:
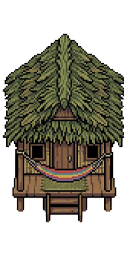
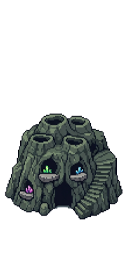
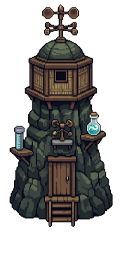
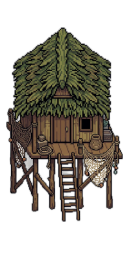
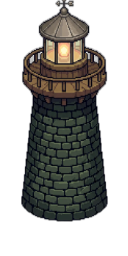
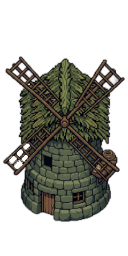
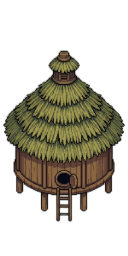
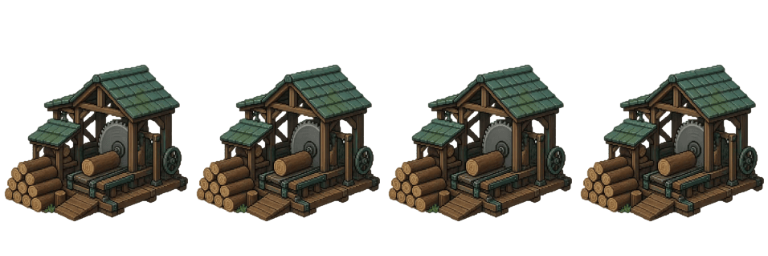
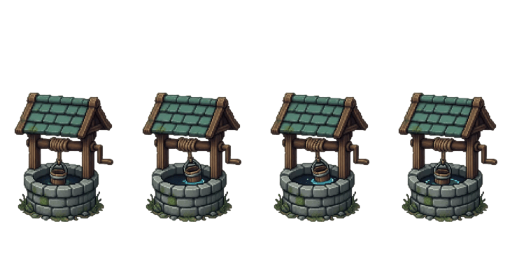
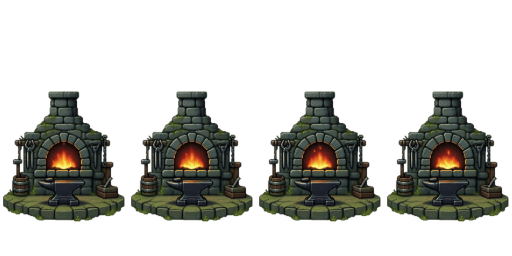
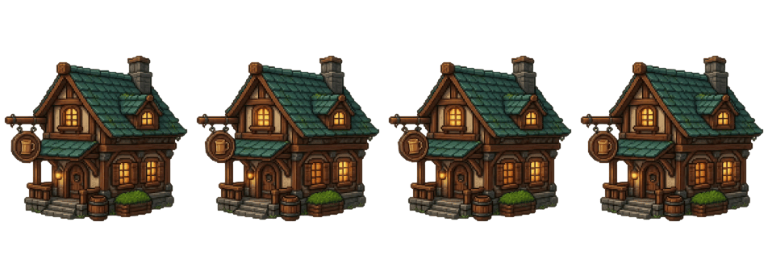
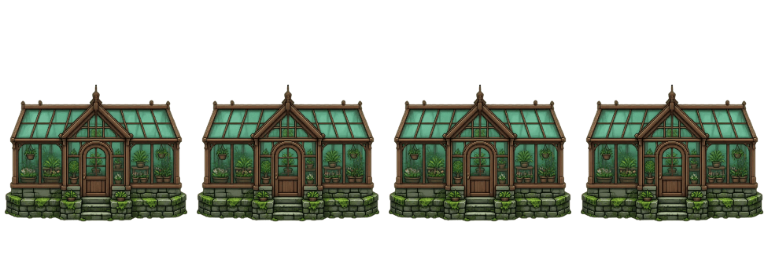
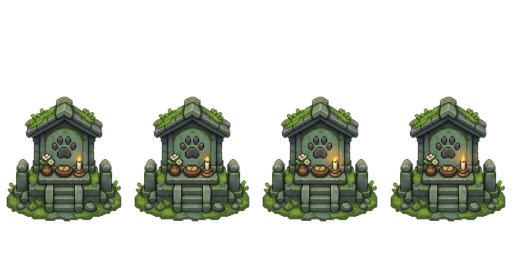
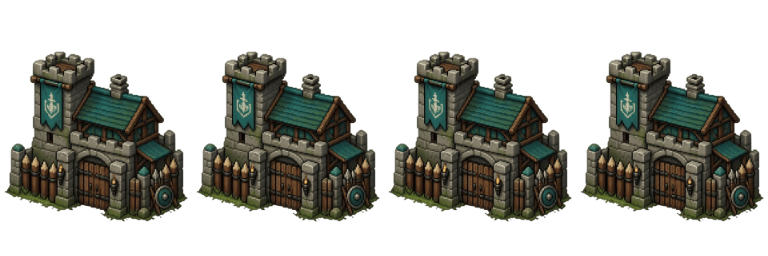
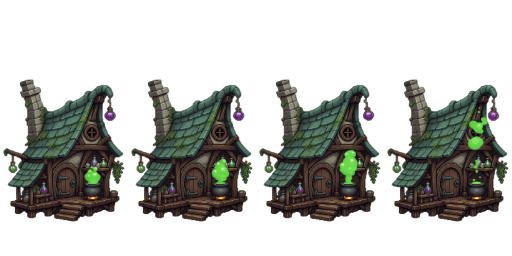
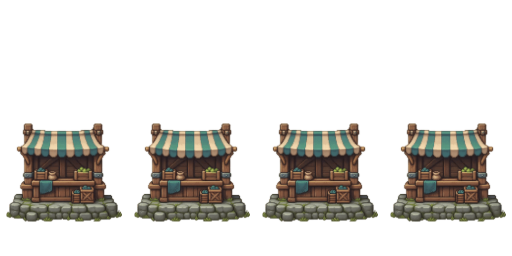
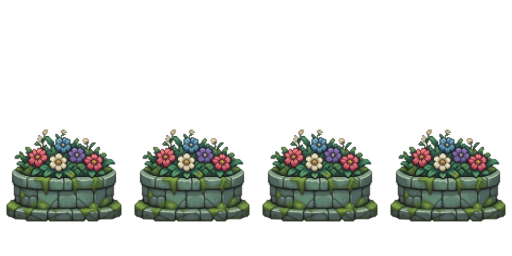
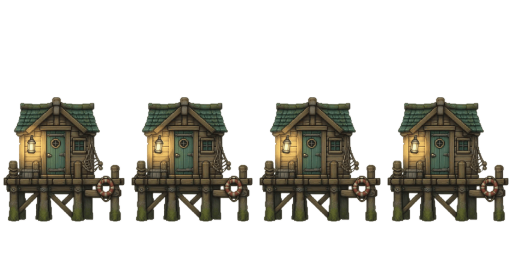
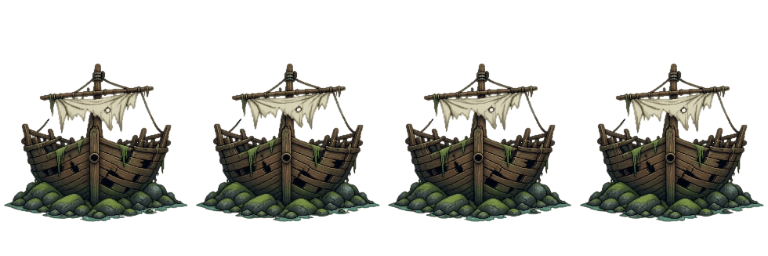
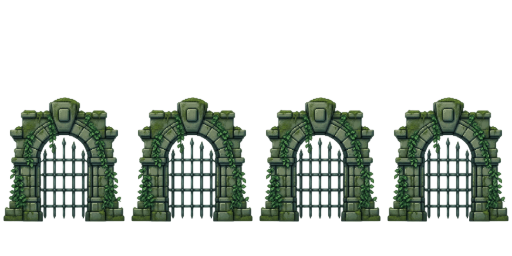
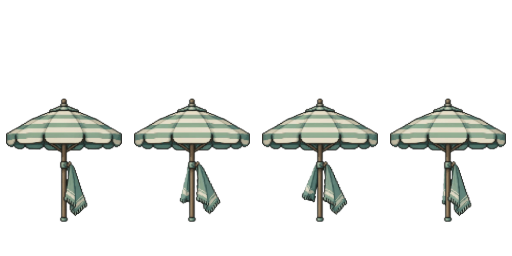
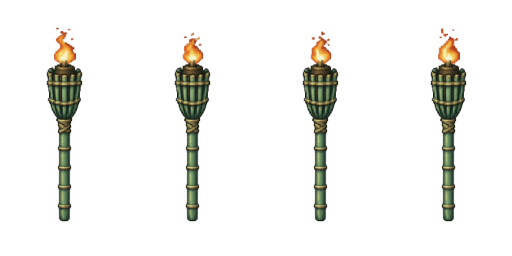
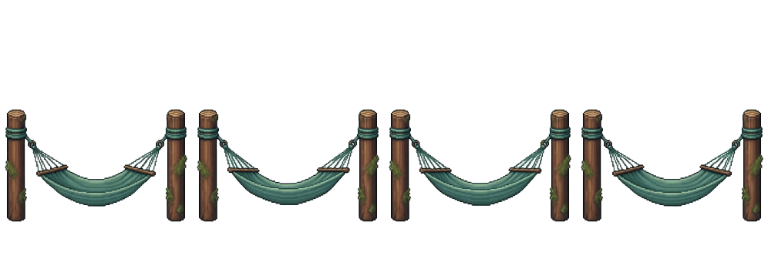
Building buffs and upgrades
Many buildings grant permanent buffs. Placing a buff building costs its level 1 price and the buff is active immediately. To go higher, open Build mode, tap Upgrade in the toolbar, then tap the building. Every level is paid once and the resources are consumed. There are three levels per building; costs scale with each level (usually level 2 costs about 1.9x and level 3 costs 4.5x the base price; Lighthouse and Water Well use their own step prices up to 375 diamonds and 3,375 gold). Buildings placed before this update start without a buff - upgrade them once to activate level 1. Upgraded buildings at level 2 and 3 show drifting sparkles around the building: golden at level 2 and a teal and gold mix at level 3.
- Buffs reach all your islands: a buff building applies to every island where its owner owns land, not just the island it stands on. Grouped islands count as one island.
- Island buffs work for every player on those islands, even while the owner is offline.
- Players buffs boost the stats of everyone currently on those islands.
- Owner buffs only affect the building owner while on any of their own islands.
- Buffs from multiple buildings stack additively. Every building you are allowed to build counts in full: the per-island caps equal a fully built and fully upgraded set (for example mining damage +45%, node respawn -45%, up to +24 STR / +36 VIT / +24 AGI). Limits are per player across all islands and only count upgraded buildings.
- The War Banner Totem gives your islands a chance to claim a slot of each boss wave. It only works on islands with at least 30 tiles.
- The Alchemist Hut speeds up every egg hatching on its owner's islands, including eggs placed by visitors.
- Tap any buff building in the world to see what it does; owners can upgrade it right from that panel.
| Building | Type | Buff Lv 1 / 2 / 3 | Base cost (Lv 1) | Limit |
|---|---|---|---|---|
| Stone House | Island | Mining Damage +3% / Mining Damage +5% / Mining Damage +7.5% | 75 diamonds + 500 gold + 10,000 wood | 3 |
| Stone House Side | Island | Mining Damage +3% / Mining Damage +5% / Mining Damage +7.5% | 75 diamonds + 500 gold + 10,000 wood | 3 |
| Sand House | Players | +2 VIT / +3 VIT / +4 VIT | 25 diamonds + 250 gold + 10,000 wood | 3 |
| Sand House Back | Players | +2 VIT / +3 VIT / +4 VIT | 25 diamonds + 250 gold + 10,000 wood | 3 |
| Sand House Side | Players | +2 VIT / +3 VIT / +4 VIT | 25 diamonds + 250 gold + 10,000 wood | 3 |
| Weather House | Players | +2 STR / +3 STR / +4 STR | 10 runes (any) + 50 diamonds + 7,500 wood | 3 |
| Weather House Side | Players | +2 STR / +3 STR / +4 STR | 10 runes (any) + 50 diamonds + 7,500 wood | 3 |
| Windmill | Players | +2 AGI / +3 AGI / +4 AGI | 25 diamonds + 250 gold + 10,000 wood | 6 |
| Granary | Island | Fortune +1% / Fortune +1.5% / Fortune +2% | 35 diamonds + 350 gold + 10,000 wood | 6 |
| Fisher Hut | Island | Fish Bite Speed +5% / Fish Bite Speed +10% / Fish Bite Speed +15% | 50 diamonds + 500 gold + 12,000 wood | 3 |
| Lighthouse | Island | Node Respawn -3% / Node Respawn -5% / Node Respawn -7.5% | 80 diamonds + 500 gold + 15,000 wood | 3 |
| Lumber Mill | Island | Chop Damage +5% / Chop Damage +10% / Chop Damage +15% | 50 diamonds + 500 gold + 12,000 wood | 3 |
| Water Well | Island | Node Respawn -3% / Node Respawn -5% / Node Respawn -7.5% | 80 diamonds + 500 gold + 15,000 wood | 3 |
| Blacksmith Forge | Players | Damage vs Enemies +1% / Damage vs Enemies +1.5% / Damage vs Enemies +3% | 40 diamonds + 400 gold + 12,000 wood | 3 |
| Tavern | Players | Enemy EXP +1% / Enemy EXP +1.5% / Enemy EXP +3% | 30 diamonds + 300 gold + 10,000 wood | 3 |
| War Banner Totem | Island | Boss Chance +3% / Boss Chance +5% / Boss Chance +8% | 60 diamonds + 600 gold + 10,000 wood | 3 |
| Signal Beacon | Island | Enemy Spawns +5% / Enemy Spawns +7.5% / Enemy Spawns +10% | 50 diamonds + 500 gold + 10,000 wood | 3 |
| Hunters Lodge | Island | Meat Drops +2% / Meat Drops +3% / Meat Drops +4% | 30 diamonds + 300 gold + 10,000 wood | 3 |
| Monument of Progress | Island | Island XP +5% / Island XP +7.5% / Island XP +10% | 50 diamonds + 500 gold + 12,000 wood | 3 |
| Greenhouse | Island | Tree Respawn -5% / Tree Respawn -10% / Tree Respawn -15% | 60 diamonds + 500 gold + 15,000 wood | 3 |
| Pet Shrine | Owner | Pet Damage +2% / Pet Damage +3% / Pet Damage +4% | 60 diamonds + 300 gold + 8,000 wood | 3 |
| Guard Barracks | Owner | Guardian HP +5% / Guardian HP +7.5% / Guardian HP +10% | 40 diamonds + 400 gold + 12,000 wood | 3 |
| Alchemist Hut | Owner | Hatch Time -5% / Hatch Time -7.5% / Hatch Time -10% | 60 diamonds + 600 gold + 8,000 wood | 3 |
The old Spawn Surge meat boost has been retired - the Signal Beacon building replaces it with a permanent spawn rate buff.
The Teleporter
The Teleporter is a placeable building that connects your island to a world wide travel network. Find it in the build palette under Buildings. It costs 250 diamonds + 25,000 gold, and each island group can hold one teleporter. Once placed, your island becomes a destination every player can travel to - and every paid visit earns you gold.
- Walk onto any teleporter to use it: step onto (or tap) a teleporter pad - yours or anyone else's - and the travel interface opens. It lists Goldcrest Isle first, followed by every island group that has placed a teleporter. Pick a destination and you arrive right next to that pad. A permanent teleporter stands on Goldcrest Isle near the spawn, so you can always travel outward from the main island.
- 25 gold per trip, paid to the destination owner: every teleport costs the traveler 25 gold, credited to the owner of the destination island (even while they are offline). Traveling to your own island is free. Trips to Goldcrest Isle also cost 25 gold (it is a system island, so nobody collects it). There is a 30 second cooldown between teleports.
- Combat rules apply: you cannot teleport while defeated, in a duel, within 5 seconds of taking a hit, or from inside a raid, Extraction Run or boat race.
- Starter area: teleporters are for the Overworld only - heroes in the level 0 to 14 starter area cannot use them (the destinations all lie in the Overworld).
- Fixed placement: a teleporter cannot be moved with the builder move tool. Removing it takes the island out of the network (no refund), and you can place a new one afterwards.
Boat races (build & host)
Own a big island? Build your own boat race track, let players race on it, and earn a tax cut on every entry. A race is a quick point to point sprint across the water: first boat over the finish wins. Here is how to build one from scratch.
Step 1: Place the Race Station
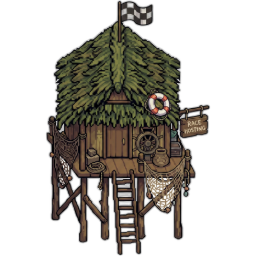
Open your build palette and find the Boathouse (the Race Station) under your island resources. You need a large island, over 50 tiles, to place it. Drop it on your land, then tap the house to open the race console. The console is yours alone: visitors who tap the station only get a simple "Join Race" view.
Step 2: Build the track
In the console tap New Track (or pick a track and tap Edit). This opens the in game track editor on a fresh water map, using the same building controls you already know. Paint these markers from the palette:
A valid track needs exactly one Start, one Finish, and at least two Checkpoints. Checkpoints number themselves 1, 2, 3... automatically, and the number floats above each one so racers know where to go next. Remove a checkpoint and the rest renumber instantly (delete number 2 and the old 3 becomes the new 2). Obstacles are water rocks: placing one turns that tile into water, so it always blocks the boat. Build a fun, twisty path, then tap Save.
You cannot casually hop into your own track to feel it out, but the editor has a Test Race button: it runs the track solo (no stake, no record) so you can drive your layout and tweak it before going live.
Step 3: Track settings
- Name and rename: give each track a clear name so racers can recognise it.
- Set active: the active track is the default a lobby uses. Build several and switch the active one whenever you like.
- Track slots: you get one track for free. Holding $Islands unlocks more slots (one more per 5,000,000 held, up to a maximum around 30,000,000).
- Speed mode: pick Everyone equal (default: every boat moves at the same speed for a fair race) or Character (faster heroes, higher Agility and speed gear, are faster).
Step 4: Set a wager (optional)
In the Wager tab you can set an entry stake: an item or resource (no gear, no $Islands) that every racer pays to join. You keep a tax cut per entry and the winner takes the rest of the pot. The tax is capped so the winner always profits, and the console shows you exactly what the winner keeps before you save. Leave it on For Fun for a free race with no payout.
Wager races need level 10 or higher (for the host and everyone who joins), the same level you need to sell on the player market. This stops people from using rigged races to pass items between fresh accounts for free.
Step 5: Host or join a race
Anyone taps the station and presses Start a Race. They see the entry stake first, then a lobby opens that others can join (2 to 8 racers). The host starts once at least two are in. A 3, 2, 1, GO countdown follows (no moving until GO), and the race begins:
- Hit the checkpoints in order, follow the floating numbers, then cross the Finish.
- Drive over a Boost for a speed burst; avoid Slow tiles and Obstacles. Each Boost and Slow works once per race, then it disappears for everyone.
- Once the first boat finishes, everyone else has 30 seconds to come in, then the race ends.
- The winner takes the pot and you, the island owner, collect your tax cut.
Step 6: Records
Every track keeps its own Records: recent winners, their times and the prize. Open the Records tab in the console to see who holds the fastest runs on each of your tracks.
Resources
Three resources drive the economy. All are earned in the world and all are tradeable:


Harvesting on someone else's island is allowed and you keep the lion's share. The player who lands the most hits gets the harvest, and the island owner earns a cut on top: felling a tree gives the harvester the full 2 to 5 wood while the owner gets +1 (roughly 80% to you), and mining a node gives the miner 2 gold or 1 diamond while the owner draws from the node's own reserve (see Gold & diamond nodes). On your own or unowned land you keep 100%. Higher Strength makes you chop and mine faster.
Gold & diamond nodes
Island owners place resource nodes on their own land. Both kinds work the same way and both are finite: every node carries an owner reserve that pays the owner out over its lifetime. Once the reserve runs dry, the node breaks for good and is gone, no respawn. This keeps resources from inflating forever.
Every gold coin in the game is backed by these nodes. Gold earned in Raids and Extraction Runs drains the reserves of random Overworld gold nodes: the node owners get that reserve paid out on the spot (as if their node was mined), and a fully drained node breaks as usual. Your raid rewards do not change, but owning gold nodes now earns from every raid played. The Starter Isles work the same way: gold, trees and fishing spots there mirror real Overworld nodes.
| Node | Place | Hits to mine | Respawn | Owner reserve |
|---|---|---|---|---|
| Gold node | 50 gold | 248 hits | about 90 minutes | 75 gold total, up to 8 per cycle (about 9 to 10 cycles, then it breaks) |
| Diamond node | 1,000 gold | 550 hits | 3 hours | 75 diamonds total, up to 9 per cycle, then it breaks |
You can mine gold nodes from level 10 and diamond nodes from level 60 (a short hint tells you when you are too low). Each time a node is fully mined, the miner (the player with the most hits) gets 2 gold or 1 diamond plus XP; gold and diamond nodes drop only their resource. The node then goes on its respawn timer and refills, until its owner reserve is spent. A node you only chip at heals back to full if it is left unhit for about a minute, and the damage tally resets with it, so whoever actually finishes the node earns the reward (no more chipping a node and leaving so others get nothing). Diamonds are a premium material: they only come from diamond nodes and feed the Seer's second quest (see The Seer & quests) and the Blacksmith's diamond gacha rolls (15 diamonds each, see Equipment & the Blacksmith). A Diamond Pickaxe adds a node-damage bonus that scales with its upgrade level, from +15% at +0 up to +60% at +6 (see Equipment & the Blacksmith), so it pays for itself fast.
Gathering Masteries: two permanent effects you unlock at the Seer and keep forever, each going up to level 100. The Lumberjack quest (level 5: fell 50 trees) awakens a mastery worth +0.5% chop damage per level, up to +50% at level 100. The Prospector quest (level 10: fully mine 25 gold or diamond nodes) awakens +0.2% mining damage per level, up to +20% at level 100. Level them in the Hero panel under Effects by offering resources, which are consumed: the Lumberjack takes wood equal to 50 times the current level (about 250,000 wood for the full climb), the Prospector takes gold equal to 10 times the current level (about 50,000 gold total) and from level 50 also diamonds (1 to 8 per level, 190 total). Both stack with the Diamond Pickaxe and island buffs, and your hit numbers show the boosted damage. Everyone can see your mastery levels in your player profile.
Mastery perks: every 10 levels a mastery unlocks an extra perk for its node type. Double Trouble (levels 10/40/70) gives a 5/10/15% chance that a depleted node pays out double yield. Harvest Haste (levels 20/50/80) makes your harvest swings 10/15/20% faster. Keen Edge (levels 30/60/90) gives a 10/15/20% chance that a swing deals double node damage. At level 100, Motherlode turns Double Trouble procs into triple yield. All perks work in the overworld, Trials and Extraction Runs.
Fishing
Island owners can build a Fishing Spot (50 gold) on any water tile. Anyone can fish it: walk up, click the spot and your hero auto-locks and casts. A cast is server timed and takes 30 seconds to 2 minutes until a bite. After each catch the line is reeled in, so you click the spot again to cast anew (no AFK auto-loop). Spots are a shared gathering point: a normal spot gives 60 shared catches, then goes quiet for a 5 minute respawn. Goldcrest Isle has 3 public spots that never run dry, so there is always somewhere to fish.
Bait is optional. In your backpack you choose what to put on the hook: None, Meat (5), Fish (1) or an Old Boot (1). Without bait you only ever pull
up fish or the odd old boot, a relaxed baseline you can run while away. With bait you
unlock the full table: gold,  gear,
gear,  diamonds and, rarest of
all, the Fisherman's Handbook, plus an extremely rare
diamonds and, rarest of
all, the Fisherman's Handbook, plus an extremely rare  rune (about 0.02%). A higher Fishing level shifts the odds in your favor. Shards no longer come from fishing; you find those on bosses and in raids.
Fish are useful: they restore 25% HP like meat, can heal a guardian (1 fish), can be assigned to your hotbar, and stack high for trading on the player market. The Old Boot is junk: keep it for bait or sell it. The Fishing skill only ever rises by reading the Fisherman's Handbook (open it in your backpack). The cost is triangular: level N needs N books in total, so level 10 takes 55 books read. You can catch the Handbook (rare) or buy it from Gandalf the Mystic for 5,000 fish and 1,000 gold (see The Mystic (Gandalf)).
Owners earn from their spots. Whenever someone else fishes a spot on your island, you collect a passive cut, even while you are offline. Every catch on your spot has a 25% chance to drop you 1 fish. If that angler uses bait, you also have a rare chance at a premium cut: gold (about 5%, 1 to 3), a diamond (about 0.2%) or the Fisherman's Handbook itself (about 0.1%), each rolled on its own. You do not earn a cut from your own fishing, so a busy spot on a popular island quietly pays its owner. A good reason to place a Fishing Spot and let visitors fish it.
Offline yield
Island owners keep earning while away: activity on your islands accrues an offline share. On your next login the "While you were away" scroll shows what you collected, including market sales that happened while you were offline.
Player market
The market (HUD button) is fully player to player. Prices are set by players, not by the game:
- Selling: every player from level 10 can sell, no license needed. List meat, gold, wood, runes or gear at your own price; the items go into escrow right away (cancel any time to get them back). Max 10,000 items / $10,000 per listing.
- Buying: pay the listed price in USDC with one wallet signature (see USDC payments). Items are delivered instantly; a listing can never be sold twice.
- Proceeds are credited to the seller's USDC balance immediately, even while the seller is offline.
Listing slots and listing time scale with your $Islands holdings. The more $Islands you hold, the more listings you can keep active at once, and the longer each one stays up before it auto-expires and returns the escrowed items to you:
| $Islands held | Active listings | Listing lasts |
|---|---|---|
| 0 | 1 | 1 hour |
| 50,000 | 5 | 5 hours |
| 250,000 | 8 | 8 hours |
| 1,000,000 | 12 | 12 hours |
| 5,000,000 | 16 | 24 hours |
| 30,000,000 | 25 | 48 hours |
Your tier is read when you connect, so re-connect after buying more $Islands to apply higher limits. Each of your listings shows a small countdown until it expires; when it does, the items come straight back to you (even while offline). Listings created before this update never expire.
The marketplace sales fee also scales with your $Islands holdings. The fee is carried by the seller (buyers always pay exactly the listed price) and is locked in when you create the listing, based on your holdings at that moment:
| $Islands held | Sales fee |
|---|---|
| below 50,000 | 30% |
| 50,000 | 25% |
| 250,000 | 20% |
| 1,000,000 | 12% |
| 5,000,000 | 5% |
Renown lowers your sales fee too. Every 3 renown levels move you one fee tier lower on the table above, on top of your $Islands tier: with renown 3 you pay at least one tier less, with renown 12 you reach the 5% floor even without holdings. The combined discount never goes below 5%. Like the holder tier, your renown is locked in when you create the listing.
The Sell tab always shows your current rate and exactly how much you will receive. Listings created before this update keep the old flat 5% fee until they expire.
Former license owners: market licenses were retired. If you ever owned one (active or expired), open the market's Sell tab and claim +5 permanent listing slots as a one-time reward. The bonus stacks on top of every $Islands tier, forever.
The market also has an Economy tab: a live dashboard of the whole game's economy. It shows trade volume and the top traders, the current supply of each resource in circulation, where resources are spent (the sinks, grouped by purpose), and the overall wealth spread across players. It's read-only market intel, useful for spotting what's scarce before you price a listing.
Referral program
Every player has a personal referral link: open the Hero panel and hit the Referral button. Share it; when a new player first connects their wallet through your link, they are bound to you permanently. Players who joined without a link can still enter a code in the Referral panel within 7 days of joining.
- Island purchases: you earn 10% of every island purchase and island fillup your referrals ever make. The buyer pays the normal price; your share is carved out of the game's cut.
- Marketplace: you earn 1% of every USDC marketplace purchase your referrals make (taken from the platform fee, which scales with the seller's $Islands holdings; sellers still receive their full share).
- Instant payout: your share is paid directly to your wallet in USDC as part of the buyer's own transaction. No claiming, no waiting.
- Activation: your link becomes active once you own at least 1 island. The Referral panel shows everyone you referred and every commission you earned.
Merchant & potions
A travelling Merchant stands by the houses near the middle of the world. Walk up and click him to open his shop. He brews consumable potions from your gathered resources, and most recipes run mainly on wood, so chopping trees pays off in a big way.
Each row has a quantity field: type how many you want (1 to 99) and the cost updates live, then hit Buy to purchase the whole stack in one go. The potions fly into your Backpack like loot. Open the backpack any time to see and use what you own.


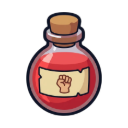
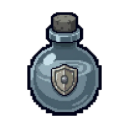

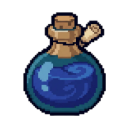
Health potions heal instantly. The three buff potions run for a few minutes and show their countdown under your health bar. In the hero panel, Strength, Ironskin and Swiftness also list their bonus right next to the matching stat, so you always see what is active.
Quick slots: the slot bar sits at the bottom left, starting with 3 slots and expandable to 9 with the small plus button. Assign any potion with the numbered buttons in the backpack, then trigger it with a click or by pressing the matching key. Your self heal sits on slot 1 by default, so a quick tap of 1 always heals. Your slot setup is saved on your device.
Slots are not just for potions: open the Emotes panel and switch to its Hotkey tab to put any unlocked emote on a slot, or open your Island panel and use the small Hotkey buttons under "Teleport home" to bind a home teleport to a slot. You can hold one teleport slot at a time (picking a new island moves it), and the usual teleport rules still apply: not while defeated, in a duel or right after taking a hit.
Boosts
| Boost | Cost | Effect | Duration |
|---|---|---|---|
| Aggro Boost (hero panel) | 25 meat | Enemies notice you from 50% further away, pull hordes faster | 1 hour |
The old Spawn Surge island boost has been retired - build a Signal Beacon for a permanent spawn rate buff instead.
Enemies & hordes
Enemies spawn 24/7 on every island. Bigger islands carry more of them, up to 40 at once - islands are packed with roaming hordes, and reinforcements arrive faster than they used to. Enemies are also a bit tougher across the board. A horde is 2 to 3 different enemies that gather at a meeting point and patrol together. If one of them spots a player in aggro range, with a clear walkable line of sight, the whole horde hunts you until you break away (about 8 tiles). Cliffs, plateaus and water break line of sight, so use your terrain. Hordes are not island-bound either: after a patrol rest there is a 10% chance the whole horde leaps across a narrow water gap (up to 4 tiles) to a neighboring island and continues its patrol there - you will see the enemies visibly hop over the water.
Kills drop a resource (99.5% meat, 0.5% gold), plus a 1% gear and 0.16% rune chance on your own kills, and XP scaled by the enemy's toughness (see Drop rates for the full breakdown). Paddle Sharks drop fish instead of meat. Enemies never damage your island or builds. They hunt heroes and guardians, and get tougher as the island they spawn on levels up (see Island levels below).
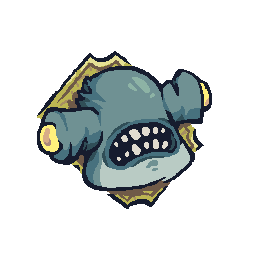
Bosses
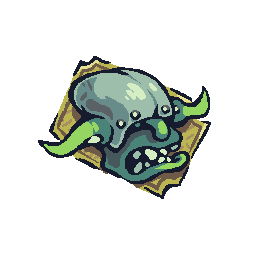
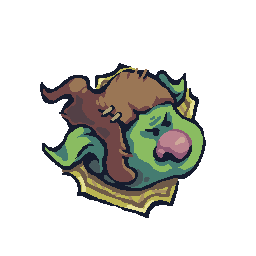
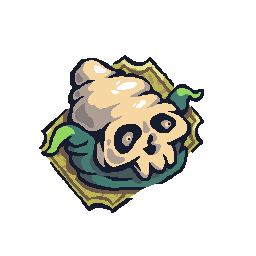
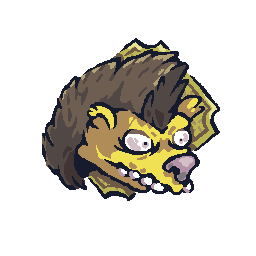
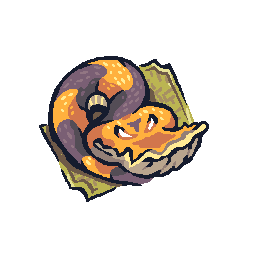
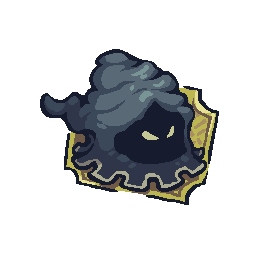
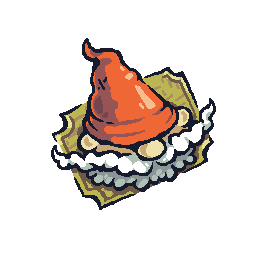
Beyond the hordes, large islands can spawn a boss: a single, very tough monster that roams on its own instead of patrolling in a group. Only islands of at least 30 tiles can spawn one. Bosses arrive in waves: roughly every 25 minutes (about 19 to 31 minutes), 3 to 4 bosses spawn at the same time on different islands, and bigger islands are more likely to be picked. A War Banner Totem lets an island roll to claim a wave slot for itself. After a boss dies, its island waits a 1 hour cooldown before another can appear there. When a boss spawns, the whole world gets an announcement.
Bosses never arrive alone: the Bear and Minotaur bring 2-3 mini versions (bear cubs and mino calves), the Arcane Horror brings exactly 2 Dark Mage minibosses - ranged casters far tougher than regular enemies whose void orbs hit for triple regular damage. Escorts count as normal enemies but hit harder, take more killing (their health scales with the island's level like any other enemy), and the cubs' and calves' blows can shove you back like the big boss does - and each escort carries a tiny 0.005% chance to drop a Tier 3 pet egg. The bosses also call reinforcements as they lose health: the Bear summons a wave of fast mages and daggers every 2% of its health, the Minotaur and the Arcane Horror every 5% - they come with double speed and attack rate and go straight for whoever is fighting the boss.
The Arcane Horror keeps its full Extraction Run spellbook on the overworld. It throws fast void orbs from range as its regular attack, and rotates three special attacks: an arcane nova that blasts and knocks back everyone close to him, a life drain that damages every player in a wide radius and heals him for part of it, and a comet barrage - 10 comets raining down staggered over several seconds across a huge area, with no warning markers: watch the sky and keep moving. All of its damage scales with the island level like any other boss.
A spawning boss clears the ground it lands on: trees, gold and diamond nodes in a radius around it count as fully harvested - the island owner receives the yield as if a player had mined them. Bosses can therefore appear even on fully built-up islands, and if one gets tangled in nodes while fighting, it slowly smashes them too (the owner keeps getting the yield).
A boss only wakes up when you get close, so you can scout one before committing. Its health and damage scale with the island level it spawns on: up to 5x health and 2x damage on a high level island, so a boss there is a serious fight. The good news is that a boss is a shared kill: everyone who deals at least 2% of its health and is online when it falls is rewarded with a flat 90 XP and loot scaled to their damage share (four tiers, T1 to T4): gold at every tier, then shards and diamonds, then gear and runes (see Equipment), and a guaranteed diamond plus a bonus drop for the top tier. The exact per tier chances for every boss are in Drop rates.
So team up: bringing friends to a boss means more damage, a faster kill and a reward for everyone.
The Kraken (water world boss)
The Kraken is a special water world boss that belongs to no island. About every 3 hours one rises from the open sea next to an active island and the whole world gets an announcement. With 40,000 HP it is by far the toughest world boss (about ten times a Minotaur), so it always wants a crowd.
It fights with three telegraphed attacks: a heavy single-target tentacle slam, a whirlpool that hits everything around it and knocks you far back, and a 3 tile beam it channels to the left or right. Watch the wind up and step out of the marked area. The Kraken slowly drifts toward the coast and can strike heroes and guardians alike. Its current health shows as a number on the boss health bar, and a marker on the minimap follows it as it moves.
It never comes alone: every time it loses about 2% of its health it erupts a burst of 30 to 40 Paddle Sharks, and these are far tankier than open-sea sharks and hit a little harder. They keep coming (capped at 50 in the water at once so the server stays smooth), so the swarm never lets up as you wear it down. Sharks drop fish like in the open sea. The Kraken's loot follows the damage tiers (see the Kraken table): plenty of gold, shards, diamonds, gear, runes and a flat shot at the Fisherman's Handbook, but no meat and no boat skin.
The Black Bull (land world boss)
The Black Bull is a land world boss on its own 90 minute cycle, independent from the Kraken. It spawns on a big island (over 100 tiles) that currently has an online player nearby, and the whole world gets an announcement. With 40,000 HP it hits just as hard as the Kraken.
It fights with four telegraphed attacks: a Ground Stomp where it leaps into the air and slams down for a big area of effect, a Roar that hits a cone in front of it, a Bellow that hits everything in a wide radius around it, and a Horn Charge that dashes through you, chaining up to 2 jumps in a row and damaging on every landing, letting it cross from island to island. Watch the wind up and step out of the marked area. Its current health shows as a number on the boss health bar, and a marker on the minimap follows it.
Every landing also smashes into the resources around the impact: trees on owned land are felled instantly, while gold and diamond nodes take 25% mining damage per landing. Whatever a landing finishes mining pays out in full to the island owner (nodes keep their normal reserve, regen and respawn rules, unowned land is left alone). A rampaging bull on your island is free income, if you survive it.
As it takes damage it summons help on two fronts: Paddle Sharks in the water around its island, just like the Kraken, and escalating waves of regular island enemies on land that keep growing in size the longer the fight goes on. The Black Bull's loot follows the same damage tiers as the Kraken (identical table).
Island Frenzy
Roughly every 15 minutes the sea picks one island and whips it into an Island Frenzy: a sudden swarm of enemies that ignores the normal spawn cap. The whole world gets a banner, and the island lights up orange on the minimap so you can sail straight for it.
Only islands above 25 tiles can be picked. A Frenzy floods the island with 35 to 42 enemies (more on bigger islands) scattered across free ground, plus up to 18 Paddle Sharks that close in from the surrounding water. Frenzy enemies are no joke: they hit for double damage, carry double health and move twice as fast as normal mobs, so a Frenzy is best cleared with friends or a strong guardian line.
The event runs until the island is cleared or about 30 minutes pass. To share the clear bonus you have to do real work: kill at least 3% of the Frenzy enemies (not just tag one) and be online when it ends. Qualified heroes get 10 to 20 gold, a 5% chance at 1 to 2 diamonds, and a 0.25% roll at a gear piece that can be mythic. The Frenzy sharks drop fish like any open-water shark, and they vanish
the moment the Frenzy ends.
The Sunken Trials
Warmaster Bram stands near the central spawn and runs the raid lobby. He offers two trials: pick the Sunken Trials (this section) or the Shallow Trials (a lighter raid for levels 5 to 25) on his selection screen. In either lobby you can create or join a party, use Quick Join matchmaking with a ready check, buy War Sigils (the Sunken raid ticket), or rejoin a run you dropped from while it is still live, straight onto your group's current map. This also covers connection drops: if you disconnect mid run, even solo, the run stays open for a rejoin for up to 15 minutes. When a run ends, a reward summary shows everything you earned: your drops, your kills and your damage share, for both trials.
The Sunken Trials are an instanced dungeon you enter from the world, alone or as a party. They are a separate, private copy of several hand-built maps that you clear back to back. Entry needs a War Sigil, which you get from the Seer (turn in 150 Diamonds for 5). You keep your hero, your stats and your guardians, who come along with you.
Each map is packed with enemies that scale with your level (like island enemies) and pay 15% more XP than the overworld - every kill and boss inside a raid is boosted. Raid bosses call reinforcements too: every 10% of health they lose, a wave of fast mages and daggers joins the fight. Each map ends at a checkpoint portal. Reaching it loads the next map. In a group you do not all have to step in: once the majority of living members stand on the checkpoint, the whole party (and every guardian) is pulled through together, so no one can grief the run by hanging back.
The middle maps are held by a miniboss (a Bear or a Minotaur); the final map ends with the Troll endboss. Bosses only wake when you get close, show a boss health bar and name, and reward everyone who helped bring them down.
You can harvest inside a Trial just like the overworld: chop trees and mine gold and diamond nodes with the same multi-hit feel and the same level gates (gold at level 10, diamond at level 60). Nodes deplete for the rest of that run.
Dying does not kick you out. You drop the usual XP and respawn at the last checkpoint after a short countdown, so the party can keep going.
War Ledger: the moment you enter a trial, a small tracker panel appears on screen (it leaves when you do). It shows the clear progress of the current map (how many of its enemies are down, as a bar with a percentage) and, for every boss on the map, a damage meter: one bar per party member, sorted by damage dealt to that boss, plus the boss's remaining health. Slain bosses stay listed with their final numbers until the next map loads. Every damage bar shows the raw damage and its percentage of the boss's maximum health (the same scale as the boss health bar - solo hits no longer read as "100%"), plus a loot tier chip (T1-T4) in the rarity colors showing the reward tier you would earn if the boss fell right now (including the raid clear path to T4; a dash means you are below the 2% loot threshold). The enemy section lists each member's kills with their share too. Like the quest tracker, you can collapse it to a small pill with its X and reopen it anytime; it updates live every 2 seconds, can be dragged by its title to any spot and resized by its corner handle - both are remembered on your device. On phones the ledger starts collapsed by default, and every collapsed pill (War Ledger, quest tracker, status banners) can itself be dragged anywhere. The War Ledger also opens in the open world: hit any world boss (island bosses, the Kraken, event bosses) and the ledger appears with that boss's damage meter - everyone who joins the fight shows up live with their damage, share and loot tier chip. It hides itself a few seconds after the boss falls or once you stop fighting.
A few practical notes: a run has a 60-minute time limit shown as a countdown in the raid banner (on phones the banner starts collapsed as a small pill with map progress and timer - tap to expand, X to collapse, drag it anywhere), and there is a 1-hour entry cooldown that starts the moment the run begins - finishing early does not shorten it (the NPC shows when the next run opens). Your guardians fight alongside you and follow across water in their own boat; if one falls you can revive it for 50 meat from the hero panel, right inside the Trial.
A Trial pays out at every step, not just at the end:
- Regular enemies drop a resource to whoever lands the kill (almost always meat, rarely gold) plus a 1% chance at gear.
- Nodes you harvest work like the overworld (multi-hit, shrinking nodes): 2 to 5 wood per tree, 1 gold per gold node and 1 diamond per diamond node, each with XP; nodes drop only their resource (no gear, no runes).
- Clearing the Trial (felling the final boss) rewards every member who is online: 150 gold, a guaranteed gear roll (up to Epic - Mythics come from boss damage rolls only), a 30% chance at a Void Shard for the Seer, and 300 XP.
On top of that, every boss (the Bear and Minotaur minibosses and the Troll endboss) rewards everyone who dealt at least 2% of its health and is online when it falls, scaled to their damage tier. The full per tier tables for the minibosses and the Troll are in Drop rates. The rare pre-upgraded (+1 / +2 / +3) gear a boss can drop is the only source of ready-made upgraded gear, favouring +1 over +2 over +3, so a +3 straight from a boss is a true jackpot.
The Shallow Trials (level 5-25)
The Shallow Trials are the little sibling of the Sunken Trials: an instanced raid made only for heroes between level 5 and 25. It exists to help fresh players level faster and pick up their first real gear. Talk to Warmaster Bram and pick it on his trial selection screen; outside the level window the entrance stays closed.
- Entry: 1000 wood instead of a War Sigil, paid only when the run actually starts (waiting in the queue is free).
- Level gate 5 to 25, checked when you queue or join a party and again at the start. Leveling past 25 mid-run does not kick you, and rejoining a live run always works.
- Entry cooldown: 2 hours, starting the moment the run begins - the same rule as the Sunken Trials (1 hour there). Finishing early does not shorten it; the lobby shows when the shallows open again.
- The lobby works exactly like the big raid: parties, Quick Join matchmaking with a ready check and rejoin, all fully separate from the Sunken queue and cooldown.
The run crosses four island maps: Tidewalker's Landing, The Brine Gardens, Gullwing Shoals and finally The Horned Reef, where a single Minotaur waits as the endboss. There are no other bosses on the way. Enemies scale with your party's average level, so the Trial grows with you instead of walling you off.
One rule is unique to the shallows: gold nodes have no level requirement here, so even a level 5 hero can mine them (the overworld and the Sunken Trials keep the level 10 gate). The maps carry no diamond nodes.
Rewards are tuned for leveling, not for farming. Clearing the Trial pays 10 gold, a guaranteed gear roll that tops out at epic (no mythic in the shallows), a 30% chance at a Void Shard and 300 XP. Minotaur loot is capped at 10 gold and exactly 1 diamond per qualifying player, there is no boat skin and no pre-upgraded gear, and runes drop like in the big raid. Pet eggs top out at Tier 3 with the same 0.005% chance the big raid rolls for a Tier 4 egg, only for top damage dealers on the boss.
The Abyssal Trials (level 50+)
The Abyssal Trials are the hardcore raid for seasoned veterans: the full Sunken toolset (parties, Quick Join, rejoin, War Ledger), but crueler in every way. Pick it on Warmaster Bram's trial selection screen.
- Entry: 2 War Sigils, level 50+, 1 to 3 players (solo allowed).
- 45 minute time limit. The War Ledger shows the countdown; when time runs out the raid ends and everyone is returned to the overworld with no finish reward (loot already dropped stays yours).
- No respawns. The fallen stay down until their warband clears the current map - everyone revives at full health when the next map begins.
- Three lives per run. Your first three deaths work as described above. After the third one you are out of the trial - unless you take the one and only buy-back: dying over the limit opens a 1 minute offer to spend 15,000 $Islands and get straight back up with full health, on a spot with no enemies nearby. You need at least 20,000 $Islands for the offer to appear (the 15,000 plus the 5,000 minimum you need to keep playing), and it can only be taken once per run. Decline it, let it expire or fall again afterwards and you leave the trial for good. Deaths are counted per run and survive a reconnect.
- Full wipe = map reset. If everyone falls, the whole map restarts with every enemy back - but bosses you already killed stay dead, only the regular enemies return. The timer keeps running.
- Enemies have 2x health and deal 1.5x damage - trash and bosses alike. On top of that, bosses get another +50% health and +50% damage, and the creatures from the Extraction Run (Ninja, Hunter, Necromancer, Cleric, Crypt Creature, Dark Mage) hit 35% harder than they do in Extraction.
- No entry cooldown - the 2 War Sigils are the only gate.
Four maps in waters darker than any overworld sea. On Abyss I to III you fight island to island along a chain from your landing spot to the exit: Abyss I (Bear and Minotaur), Abyss II (Dark Knight and Bear) and Abyss III (Minotaur and Troll). The finale Abyss IV is an archipelago where Troll, Kraken and Arcane Horror await at once.
Regular enemies drop the normal raid loot (including upgrade materials) - plus two Abyss extras: every trash kill drops double meat and has a 0.075% chance to drop a Mythic gear piece. All XP in the Abyss is boosted by 10%. Bosses pay 2.2x XP, roll shards at 1.5x the usual chance, drop upgrade materials at 1.5x the boss rates (see Materials) and roll the Tier 4 pet egg at 0.0075% (instead of 0.005%). Clearing all four maps within the time limit pays 200 gold, a guaranteed Epic gear piece with a 7.5% chance to be Mythic instead, 3 Epic upgrade materials with a 7.5% chance that one is Mythic, a shard chance and 660 XP.
Extraction Run
A group game mode on a freshly generated island archipelago. Talk to Warmaster Bram (the raid NPC) and open the Extraction Run lobby - it has the same tools as the raid lobbies: Create Group to open a named group, Join an open group from the list, or Quick Join the queue. In the queue everyone presses Ready: the run launches as soon as all queued players are ready, or when the 2 minute timer runs out (then only the ready players enter). A group is launched manually by its leader once it has enough members. Every run needs at least 2 and takes up to 25 players; entry costs 100 gold, taken from everyone at the same moment the run starts. If you do not have the gold at launch, you are dropped from the start.
Richer drops: every item chance inside an Extraction Run is 10% higher than the same roll anywhere else. That covers the trash drops (gear, runes, Tattered Manual), the boss loot (shards, diamonds, gear, runes, manuals, boat skins, the tier 4 pet egg) and the gear roll of the extraction reward. Gold payouts are not affected.
Loot only becomes permanent once you extract it. Everything you collect during the run sits in a temporary run inventory - it is not in your real inventory yet. The entry point is marked by a tall golden beam and the status banner shows a rotating arrow pointing back to it. Stand at the entry and press the Extract button (top of the screen, only active near the entry) to channel for 4 seconds and bank your run loot into your real inventory. Getting hit or moving away from the entry cancels the channel. On phones the status banner starts collapsed as a small pill (wave and timer) so it does not cover your health bar - tap the pill to expand it, tap its X to collapse again, and drag the pill anywhere you like; both are remembered on your device.
The start is safe: every player lands on their own spawn spot near the entry with no enemy within 6 tiles, and the initial population keeps a clear zone of 8 tiles around the entry beam - nobody gets attacked the moment they spawn.
Death is final. If you die before extracting, you drop everything you have not banked yet, right where you died - it shows as a glowing gold marker on the ground - and you are out of the run. Anyone still in the same run can click your drop to pick it up, but they have to extract it themselves too. Dying does not cost XP; your entry cooldown runs as usual.
Buy back your life: if your wallet holds at least 20,000 $Islands (the 15,000 revive cost plus the 5,000 minimum you need to keep playing), dying in the run offers a second chance for 1 minute: spend 15,000 $Islands to get back on your feet with full health, keeping your entire run inventory. While the offer counts down, your loot stays on hold - nothing drops and nobody can pick it up. The revive puts you on a safe spot with no enemies nearby. You can revive as often as you can pay - it costs the full amount every time. If you press Leave Run, the timer runs out or the payment fails, you die normally: your loot drops where you fell and you are out of the run. Below 20,000 $Islands no offer appears and death works as described above.
The archipelago starts populated (up to 300 enemies across the whole map), and endless waves keep coming: every 2.5 minutes the next wave refills the map back up to that ~300 enemy population - the more you cleared, the bigger the reinforcement (a full clear brings a full ~300 respawn; barely touched maps still get at least 10 fresh enemies). Every new wave hits harder and has more health (+15% health and damage per wave, multiplying without limit). Every wave change is announced with a big on-screen banner. Clear the whole map (every enemy and every boss dead) and the next wave launches immediately instead of waiting for the timer - the 2.5 minute wave clock restarts from that moment. Every 3rd wave is a boss wave with 2 to 4 bosses at once - a mix of Dark Knight, Arcane Horror, Bear, Minotaur and the Troll, spread across different islands of the archipelago (each boss wave rotates its islands). Bosses also call reinforcements every 10% health they lose (thieves, shamans and crypt creatures around them), just like raid bosses. There is no end: around wave 10 to 12 even a level 100 hero is in real danger. The run closes automatically after 45 minutes - anyone still inside loses whatever they have not extracted. There is a 45 minute cooldown per player between runs.
Extraction reward: extracting successfully at wave 3 or later pays a bonus on top of your run loot: 20 gold at wave 3, +10 gold per wave, hard-capped at 150 gold. There is also a chance for a bonus gear roll: 6% at wave 3, +4% per wave (capped at 55%), and the piece can come pre-upgraded (+1/+2/+3) with odds that grow the later you extract. Rewards scale with the waves you actively fought: a wave only counts toward your bonus if you dealt damage or scored kills during it - idling (for example standing out in the water) freezes your reward wave while the run clock keeps going. Your collected run loot is not affected by this. Nothing of this is paid on death or timeout. After every run a summary shows your kills, damage, XP earned, extracted loot and the wave bonus. Your XP earned so far is also shown live in the status bar at the top during the run (XP from kills is granted instantly and is never lost, even if you die).
Stats and leaderboard: every kill in a run counts toward your kill statistics (the archipelago creatures appear in your profile's kill grid with their own portraits; Dark Knight and Arcane Horror count as boss kills). Each successful extraction and every item you bank feed the Extractions and Items Extracted boards in the Leaderboard (gold amounts do not count as items), and your profile shows your total successful extractions.
Enemies drop the real overworld loot straight into your run inventory. Per regular kill: 99% meat / 1% gold (Paddle Sharks in the water drop fish), 1% gear (up to Epic, rings included), 0.4% rune and a 0.05% Tattered Manual. Regular enemies never drop pet eggs here. Your Fortune rune affix boosts the gear, rune and pet egg chances in the run exactly like in the overworld. Bosses use the overworld boss damage-tier table (see Drop rates) with a run-specific economy tune: boss gold is reduced to 60% of the overworld roll (9 to 18 gold base, then damage-tier scaled), diamonds drop at an 8% chance (overworld: 12%) and in half the quantity (the guaranteed tier 4 diamond stays guaranteed, just halved in amount). The rest matches the overworld boss: tiered shard rolls, a 15% gear chance from tier 3 that can roll mythic like a raid boss, runes at 0.4%/0.6%, a 0.005% Tier 4 Pet Egg at tier 4, a 3% pre-upgraded (+1/+2/+3) gear at tier 4 and a Tattered Manual at half the world-boss rate (1% / 2.5% / 5% / 10% per tier). Everything - gear rolls included - only becomes real once you extract it.
Mining and chopping: the archipelago's gold nodes, diamond nodes and trees can be harvested during the run - swing at them with no enemy in reach, exactly like in the overworld. Trees fall after 16 hits for 2 to 5 wood, gold nodes empty after 248 hits for 1 gold, diamond nodes after 550 hits for 1 diamond. Gold mining has no level requirement inside the run (diamonds still need level 60, as everywhere). Nodes drop only their resource, and harvesting grants the usual mining/chopping XP. If several players work the same node, the yield goes to whoever contributed the most hits. Everything harvested lands in your run inventory - it only becomes real once you extract it, and it counts toward Items Extracted (gold amounts excluded, as always).
Non-aggro enemies roam the islands like overworld hordes and chase you from much further away than world enemies do, bosses included. Ranged enemies attack from 50% further away than their overworld counterparts, and their projectiles fly fast. Watch the water: Paddle Sharks patrol the coastlines. Kills show the familiar loot pop-ups, and the status banner lists exactly what you are carrying - remember it only becomes real once you extract.
Your guardians come with you: following guardians (Warrior, Archer, Monk) fight in the run exactly like in raids - they stick to you, attack the archipelago creatures (their kills loot into your run inventory), the Monk heals you and your group, and enemies target them too. A guardian that falls in the run is revived through the Hero panel as usual. Your equipped pet also fights alongside you, and its Leeching affix heals you on your hits just like in the overworld.
The archipelago also fields its own creature roster, mixed into the regular world enemies - you will not meet these anywhere else:
| Creature | Behavior |
|---|---|
| Ninja | Fast melee. Slowly fades invisible, reappears right behind you and strikes for double damage. |
| Hunter | Ranged - fires fast crimson arrows (dodgeable). |
| Necromancer | Slow walker, hurls quick shadow bolts from range. |
| Cleric | Tanky melee bruiser - the toughest regular enemy. |
| Crypt Creature | Tiny swarm creature - always appears in packs of 3, very little health but a fast, painful bite. Barely worth any XP. |
| Dark Mage | Slow caster - lobs big void orbs that explode in an area on impact. |
| Dark Knight (boss) | Heavy melee boss with area strikes and knockback. |
| Arcane Horror (boss) | Magic boss with three rotating special attacks: an arcane nova that blasts and knocks back everyone close to him, a life drain that damages every player in a wide radius and heals him for part of it, and a comet barrage - 10 comets raining down staggered over several seconds across a huge area, with no warning markers: watch the sky and keep moving. He also throws fast void orbs in between. |
Drop rates
The exact chances for every drop in the game, by source. Resource amounts are in brackets. When a gear piece drops it rolls a rarity (see Equipment); only bosses and raids can roll a mythic piece, every other source tops out at epic.
Enemies (per kill)
Every enemy you defeat drops one resource to you and the island owner: 99.5% meat or 0.5% gold. Your own kills also roll a 1% gear drop (never mythic) and a 0.16% rune (see Runes). Kills by your guardians give the resource only. Paddle Sharks, the Kraken's water minions, drop fish instead of meat (the 0.5% gold still applies). A separate 0.3% chance also drops a Pet Egg (Tier 1 to 3, tier improving with the island's level), and a 0.05% chance drops a Tattered Manual (30% chance to level a skill tome when read) - that one applies to every kill credited to you (guardians, pets and skills included) and is the same rate in raids (no raid multiplier). Kills in the open world and on the Starter Isles also roll a 0.45% Teleport Scroll: use it from your backpack or a hotbar slot (a confirm prompt guards it) to return straight to Goldcrest Isle. The teleport is blocked while you are dead, within 5 seconds of taking a hit, and inside raids, Extraction Runs and boat races - the scroll is only consumed when the teleport actually happens. Raid enemies and bosses never drop it, there is no cap on how many you can hold, and it trades on the player market. The Fortune enchant raises the drop chance.
Resource nodes (per node depleted)
| Node | Resource | Gear | Rune |
|---|---|---|---|
| Tree | 2 to 5 wood | - | - |
| Gold node (level 10+) | 2 gold | - | - |
| Diamond node (level 60+) | 1 diamond | - | - |
Fishing (per catch)
Without bait you only land fish (1 to 2), with an 18% Old Boot. With bait the full table opens and your Fishing level shifts the odds (shown at level 0, then level 10). Fish (1 to 3) is whatever chance is left over. Every cast also rolls a separate, very rare 0.02% rune. Shards are not part of the fishing table (bosses and raids only).
| Catch (baited) | Level 0 | Level 10 |
|---|---|---|
| Fish (1 to 3) | ~72.6% | ~84.4% |
| Gold (1 to 5) | 18% | 11% |
| Old Boot | 8% | 2.5% |
| Gear (never mythic) | 1% | 1.5% |
| Diamond | 0.3% | 0.4% |
| Fisherman's Handbook | 0.1% | 0.2% |
Spot owners earn a cut when a stranger fishes their spot: 25% for 1 fish, and if the angler uses bait also 5% gold (1 to 3), 0.2% a diamond and 0.1% the Handbook, each rolled on its own.
Bosses (damage tiers)
Every boss is a shared kill. Anyone who deals at least 2% of its health and is online when it falls is rewarded and gets a flat 90 XP. Your damage share sorts you into a tier that decides how much loot you get. For world bosses you also have to be in the overworld when the boss dies: players sitting inside a Raid or Extraction Run at that moment still get their boss XP, but no loot.
| Tier | Your damage | Unlocks (on top of the lower tiers) |
|---|---|---|
| T1 | 2 to 7.5% | gold |
| T2 | 7.5 to 15% | shard + diamond, 1.5x gold |
| T3 | 15 to 30% | gear + rune, 2.5x gold, bigger diamonds |
| T4 | 30% and up | guaranteed diamond, best gear/rune odds, a bonus drop, 4x gold |
In raids there is a second path to T4 - made for big groups, where 30% of the boss is hard to reach: clear at least 50% of the enemies killed on the current map and deal at least 10% of that map's boss - and you are treated as full T4. Clear credit is proportional: every killed enemy is worth exactly one point, split between everyone by the damage share each dealt to it (pet and skill damage included). If two players kill the map 80/20, their clear scores are 80% and 20% - tagging along does not inflate your share. The counter resets on every map change, so each map is judged on its own. The 30% rule stays untouched; small groups lose nothing.
The tables below are per qualified player, per tier. Wood, meat, fish, the Fisherman's Handbook, the bonus pre-upgraded gear and boat skins are noted under each table. World bosses (not raid bosses) additionally roll a Tattered Manual (30% chance to work when read) per qualified player: 2% at T1, 5% at T2, 10% at T3 and 20% at T4.
Kraken & Black Bull (world bosses & raid)
| Tier | Gold | Shard | Diamond | Gear (mythic) | Rune |
|---|---|---|---|---|---|
| T1 | 30-60 | - | - | - | - |
| T2 | 45-90 | 20% | 30%: 2-10 | - | - |
| T3 | 75-150 | 30% | 30%: 3-15 | 15% | 2% |
| T4 | 120-240 | 40% | 100%: 4-20 | 15% | 3% |
Plus, for every qualified player: fish (5-12, scaling with tier up to 20-48 at T4) and a flat 5% Fisherman's Handbook. T4 also rolls a 3% pre-upgraded (+1/+2/+3) gear and a 0.005% Tier 4 Pet Egg. Neither the Kraken nor the Black Bull drops meat or a boat skin (the Black Bull uses this exact same table). The rune numbers above apply in the overworld; a Kraken fought inside a Trial rolls runes at the base rate (0.4% at T3, 0.6% at T4).
Troll (raid endboss)
| Tier | Gold | Shard | Diamond | Gear (mythic) | Rune |
|---|---|---|---|---|---|
| T1 | 20-30 | - | - | - | - |
| T2 | 30-45 | 20% | 25%: 1-5 | - | - |
| T3 | 50-75 | 30% | 25%: ~1-8 | 15% | 0.4% |
| T4 | 80-120 | 40% | 100%: 1-10 | 15% | 0.6% |
Plus: wood (100-1,000, scaling up to 400-4,000 at T4) always, and meat (100-150, scaling) at 50%. T4 rolls a 3% pre-upgraded gear, a 0.005% Tier 4 Pet Egg; a boat skin is ~0.003% at T4.
Bear & Minotaur minibosses (inside raids)
| Tier | Gold | Shard | Diamond | Gear (mythic) | Rune |
|---|---|---|---|---|---|
| T1 | 10-20 | - | - | - | - |
| T2 | 15-30 | 10% | 12%: 1-2 | - | - |
| T3 | 25-50 | 15% | 12%: ~1-3 | 15% | 0.4% |
| T4 | 40-80 | 20% | 100%: 1-4 | 15% | 0.6% |
Plus: wood (50-400, scaling) always, and meat (50-100, scaling) at 50%. T4 rolls a 3% pre-upgraded gear, a 0.005% Tier 4 Pet Egg; a boat skin is ~0.001% at T4.
Bear, Minotaur & Arcane Horror (overworld island bosses)
| Tier | Gold | Shard | Diamond | Gear (mythic) | Rune |
|---|---|---|---|---|---|
| T1 | 15-30 | - | - | - | - |
| T2 | 23-45 | 10% | 12%: 1-4 | - | - |
| T3 | 38-75 | 15% | 12%: ~2-6 | 15% | 0.4% |
| T4 | 60-120 | 20% | 100%: 2-8 | 15% | 0.6% |
Same shard, gear and rune numbers as the raid minibosses (gold is higher out here since the raid gold was reduced), plus full (unhalved) diamond rolls, and the overworld island bosses drop no wood, meat, fish or pre-upgraded gear. Their only extras are a boat skin at ~0.001% and a 0.005% Tier 4 Pet Egg, both on T4.
Raids
Inside a Trial, regular enemies drop the same 99.5% meat / 0.5% gold plus a 1% gear chance and a 0.4% rune chance (the old 5x raid rune bonus has been removed). The raid bosses follow the Kraken, Troll and miniboss tables above; boss diamond amounts are halved inside a Trial (the Troll and raid miniboss tables already show the halved rolls, and a Kraken fought inside a Trial drops half of its table too). Mining diamond nodes inside is unchanged (still 1 per node). Clearing a Trial rewards every online member: 150 gold, a guaranteed gear roll (up to Epic), a 30% Void Shard and 300 XP.
Island levels
Every island you own levels up as enemies are killed on it, by you or by your guardians. System land does not level. Each level needs more kills than the last (20 times the current level), up to level 100.
Higher island levels spawn stronger enemies on that island. Each level adds +25% enemy health and +12% enemy damage, with no cap, so a high level island becomes a high risk, high reward farm. Because tougher enemies are worth more XP, every kill there also gives you more hero XP. New spawns use the current level; enemies already on the island keep the level they spawned with.
Click an island and pick View Island to see its level and the kills left to the next one. As the owner you also see it in the island panel.
Levels & stats
XP comes from enemy kills (scaled by toughness), felled trees (3 XP) and mined gold or diamond nodes (9 XP). World bosses give a flat 90 XP. Max level is 100. Every quarter of the XP bar earns 1 stat point (4 per level) to spend freely in the hero panel:
| Stat | Effect per point | Cap |
|---|---|---|
| Strength | +1% damage (also chops and mines faster) | 130 |
 Vitality Vitality | +1 max HP (base 10) | 130 |
 Agility Agility | +1% movement speed, +0.05% attack speed | 130 |
Attack speed: your total Agility from every source (stat points, gear, pet, skins, holder bonus, Renown, island buffs, quest rewards) also speeds up your swing rate: every point grants +0.05% attack speed, capped at +50% at 1,000 total Agility. The base swing rate is one hit every 0.4 seconds; a fully maxed hero swings roughly every 0.27 seconds, and your hero visibly swings faster to match. This applies everywhere - the open world, raids, Extraction Runs, player duels, and even chopping trees and mining nodes. The hero panel lists your current bonus under special stats as "Attack Speed".
Your level shows as a gold badge next to your name, visible to everyone.
New player protection: below level 10 you earn 1.5x XP, and all enemy damage against you is reduced in two stages - 90% less at level 1, easing to 70% less at level 9, then fading to 0% at level 15 (a level 12 hero still takes 35% less). Enemies also spot you at a shorter distance (half range at level 1, full range at level 10). The damage reduction applies to every enemy hit including raids and Extraction Runs; player duels are not affected.
Below the stat points the hero panel lists your special stats: the summed value of every rune affix on your worn gear and pet (Sharpness, Slayer, Fortune, Leeching, Bulwark, Speed, Mining, Insight) plus your ring's Spell Leech, Skill Power and Cooldown Reduction - so you always see your real totals at a glance.
Holder bonus: simply holding $Islands in your wallet grants +1 to every stat (Strength, Vitality and Agility) for each 50,000 $Islands you hold, up to a maximum of +100 (reached at 5,000,000). This bonus stacks above the normal stat cap and updates from your live balance, so it grows as you buy more and falls away again if you sell. No staking or spending needed, just hold.
Prestige & Renown
Renown is the endgame prestige track for veterans who have maxed out at level 100. It never resets anything: you keep your level, stats, gear and progress. Renown just measures how far past level 100 you have pushed. Every point of XP you earn beyond the level 100 cap (495,000 XP) counts toward it, and each tier costs quadratically more: tier N needs N squared full "level 1 to 100" worth of overflow XP. So Renown 1 is another whole 495,000 XP, Renown 2 is four times that, Renown 3 nine times, and so on.
You claim it at Warmaster Bram (the same captain who runs the raid lobby) in his Hall of Renown. When you have earned the next tier the Prestige button lights up, and one click raises your Renown by +1. It is always a deliberate claim, one tier at a time, and it never goes down.
Each Renown tier gives you four things:
- A Naval War title that climbs a ten step ladder: Corsair, Reaver, Warbringer, Tidebreaker, Warlord, Dread Marshal, Stormlord, Leviathan, Sea Sovereign, and finally Eternal Tide at Renown 10 and beyond.
- A star and a coloured nameplate everyone can see on the map and in chat. The colour shifts every two tiers: orange (1 to 2), blue (3 to 4), gold (5 to 6), green (7 to 8) and magenta (9 and up).
- A small over-cap stat reward: each tier adds +10 to one stat, rotating Strength, then Vitality, then Agility. It stacks above the normal 130 cap, so a Renown 3 captain carries +10 Strength, +10 Vitality and +10 Agility over the cap, and a Renown 6 captain carries +20 of each. A slow, prestige-only edge, not a shortcut.
- A marketplace fee discount: every 3 renown levels move you one fee tier lower on the holder fee table, down to the 5% floor at Renown 12 even without any $Islands holdings. See Marketplace for the details.
Renown has its own all-time leaderboard (see Leaderboard), so the most decorated captains on the seas are ranked for all to see.
Equipment & the Blacksmith
Slain enemies and depleted gold nodes sometimes drop gear: a Weapon, Armor, Shoes or - at half the chance of the other three - a Ring. Every drop rolls a random base and one of four rarities (Common, Rare, Epic, Mythic). The rarer the item, the more bonus stats it carries, and Mythic is extremely rare.
Weapons
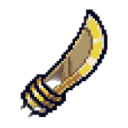
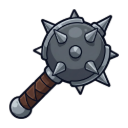
Armor
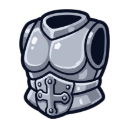
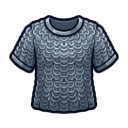
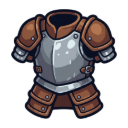
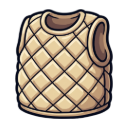
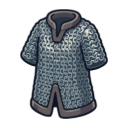
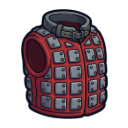
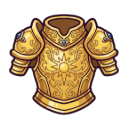
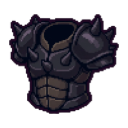
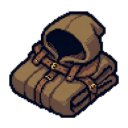
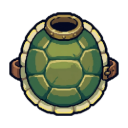
Shoes
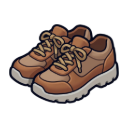
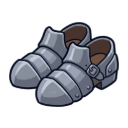

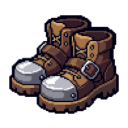
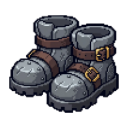

Rings





The Ring is caster gear: it carries no Strength / Agility / Vitality. Instead, every ring unlocks a second skill slot - equip two skill tomes at once and cast them independently, each with its own button next to the attack button (movable via Customize HUD) and its own hotkey (defaults Q and E, both rebindable in the Skill Tomes menu). Take the ring off and the second tome unequips with it. The two slots must hold two different skills - a second copy of the same tome cannot be equipped. The two skills share a 1 second global lock: casting one briefly blocks the other, so they can never fire in the same instant. A skill's cooldown belongs to the skill itself, not to the tome copy or slot - swapping tomes around does not reset it. Need another tome? The Seer's Circle of Power quest (level 20+) grants a skill choice for a tribute of 10 rings + 35 runes - repeatable every 10 levels (once at 20, again at 30, 40, and so on). On top of that a ring rolls skill buffs within a min-max range per rarity:
| Rarity | Cooldown reduction | Skill power | Spell leech |
|---|---|---|---|
| Common | 1-2% | +2-4% | - |
| Rare | 3-5% | +5-8% | - |
| Epic | 6-9% | +9-12% | 3-5% |
| Mythic | 10-14% | +13-15% | 6-8% |
Cooldown reduction shortens both skill cooldowns, skill power raises all skill damage, and spell leech heals you for a share of every skill hit. Rings forge at the Blacksmith like any gear (up to +6, same costs and shatter risk), but their percentages scale gently: +6 multiplies the rolled values by about 1.67, so a perfect Mythic ring tops out at 25% skill power and about 23% cooldown reduction. Rings accept at most 2 runes (other gear takes 4). Every Mythic ring additionally carries one of nine unique powers, rolled when it drops:
- Echo Cast - 15% chance a cast skill triggers a second time for free.
- Twin Surge - casting a skill cuts the other skill's remaining cooldown by 25%.
- Casting Rush - every cast grants 3 seconds of Swiftness (+20% move speed).
- War Chant - every cast grants 3 seconds of the Strength buff (shows in your buff bar and raises all your damage).
- Executioner - your skills deal 15% more damage to enemies below 30% HP (the boost shows directly in the hit numbers).
- Keen Edge - skill hits gain +10% crit chance (stacks with Sharpness; crits show as the usual big golden numbers).
- Momentum - every skill kill cuts both skill cooldowns by 1 second (the buttons update live).
- Chain Reaction - skill kills have a 30% chance to fully reset the cooldown of the skill you cast last.
- Second Wind - skill kills have a 30% chance to grant 3 seconds of +15% Spell Leech (shows in your buff bar; the healing pops as green numbers while you keep hitting).
The three on-kill powers roll at most once per second (Momentum: once per 1.25 seconds) - multi-hit skills that mow down a whole pack cannot proc them once per corpse.
War Chant and Casting Rush stack with your potions: they run on their own buff slot, so an active Strength Elixir or Swiftness Potion multiplies WITH them (potions among themselves still do not stack). Epic rings have a 3% chance to roll one of the nine powers too - at one third strength, marked "(weakened)" everywhere. Ring effects and powers are shown on the item in your equipment, on marketplace listings and when inspecting another player. Upgraded gear also shows its base (+0) roll as a small muted line in the hover card, so you can always judge the underlying roll quality.
Where do Mythic rings come from? Like all Mythic gear they never drop from regular kills. Sources: boss loot (loot tier 3+, a flat 15% gear roll with a 0.5% Mythic chance; 1 in 7 rolls is a ring, so about 0.07% per roll), the Blacksmith gacha (0.375% Mythic; rings are deliberately rare in the gacha at about 2.4% of spins, so roughly 0.009% for a Mythic ring per spin) and combining 3 Epics (5% success; the result rolls a random slot, so about 0.7% per attempt ends up a Mythic ring). Raid clear rewards top out at Epic.
Open the Equipment panel (the sword button in the HUD) to wear one item per slot. All your gear lives here now (the backpack no longer holds a gear grid). Hover any item to see a full stat card (rarity, Strength / Agility / Vitality or node damage, and every rune affix) before you equip it; on a phone press and hold the tile for the same card. While worn, an item adds its Strength / Agility / Vitality on top of your allocated points, shown as a green (+X) next to each stat in the Hero panel. Lock a slot with the little padlock to stop a worn piece from being swapped or removed by accident while you browse; tap the lock again to free it. To get rid of gear, use Salvage at the Blacksmith (it turns gear into hero XP).
Loadouts (item sets)
The Equipment panel is split into three tabs: Equipped (what you're wearing right now), Inventory (your full gear grid with search, slot and rarity filters) and Sets. The gear grid sorts best-first by default; the Sort button next to the rarity filters switches to newest drops first and back, in every gear grid (Inventory, Blacksmith, selling on the market). A set is a saved loadout: your complete gear, pet and skins under a name you choose. Save your current outfit as a set, then re-equip the whole thing with a single tap later, handy for switching between a boss build and a farming build. You can keep up to 5 sets and rename, overwrite or delete them any time. Sets are stored on your device; applying one skips any locked slot and just tells you about anything you've since sold or listed, so items in market escrow are never touched.
The Blacksmith stands by the central houses and offers Upgrade, Combine (gear and materials) and Repair.
Upgrade
Level a single weapon, armor or shoes item up to +9 (rings and the Diamond Pickaxe cap at +6). Each level adds a big chunk of stats: the stat multiplier climbs from x1 at +0 to x9 at +6 and on to x10.5 / x12 / x13.5 at +7 / +8 / +9. Every forge now also needs upgrade materials (see Materials below) from the family that matches the slot: weapons eat Ores & Metals, armor eats Hides & Plates, shoes eat Cloths & Soles (rings accept any family). Every attempt can shatter the item, and the costs are spent either way. Prices below are for a Mythic item, the most expensive rarity:
| Upgrade | Cost (Mythic) | Materials | Success chance |
|---|---|---|---|
| +0 → +1 | 105 gold + 1,750 wood | 3 Common | 90% |
| +1 → +2 | 210 gold + 3,500 wood | 5 Common | 75% |
| +2 → +3 | 420 gold + 7,000 wood | 3 Rare | 60% |
| +3 → +4 | 660 gold + 11,000 wood + 1 shard + 5 diamond | 5 Rare | 50% |
| +4 → +5 | 1,320 gold + 22,000 wood + 2 shard + 10 diamond | 3 Epic | 40% |
| +5 → +6 | 2,750 gold + 44,000 wood + 4 shard + 20 diamond | 5 Epic | 25% |
| +6 → +7 | 4,000 gold + 64,000 wood + 6 shard + 30 diamond | 2 Mythic | 20% |
| +7 → +8 | 8,000 gold + 128,000 wood + 8 shard + 40 diamond | 3 Mythic | 15% |
| +8 → +9 | 16,000 gold + 256,000 wood + 10 shard + 50 diamond | 4 Mythic | 10% |
Lower rarities pay less gold, wood, shards and diamonds: every step down cuts those costs by 40% - Epic costs about 60% of the Mythic price, Rare about 36%, and Common about 22%. The material counts stay the same for every rarity, and the success chance is the same for every rarity too.
Combine
Fuse several items of the same rarity into one item of the next rarity up. The success chance is low and drops the higher you climb, and a failed combine destroys every item you feed in. The Gold and Wood are spent either way, so it is a real gamble for a shot at a stronger piece. On a success the new item flies into your backpack.
| Combine | Items needed | Cost |
|---|---|---|
| Common to Rare | 2 Common | 150 gold + 2,000 wood |
| Rare to Epic | 3 Rare | 600 gold + 8,000 wood |
| Epic to Mythic | 3 Epic | 2,500 gold + 30,000 wood |
Upgrade materials
50 different materials drop from normal enemies everywhere you fight: the overworld, the early islands, raid trash and extraction runs (extraction loot lands in the run inventory and only banks when you extract). Materials come in three families that feed the matching gear slot at the forge:
- Ores & Metals (18 kinds) - weapon upgrades
- Hides & Plates (17 kinds) - armor upgrades
- Cloths & Soles (15 kinds) - shoes upgrades
Bosses are a material source too: every boss you qualify on (overworld world bosses and raid bosses alike) rolls an 8.5% chance for an Epic material and a 0.85% chance for a Mythic material - in the Abyssal Trials both chances are boosted by 1.5x (12.75% / 1.275%).
Each kill rolls every rarity tier separately (the Fortune rune raises all of them):
| Material rarity | Drop chance per kill |
|---|---|
| Common | 1.7% |
| Rare | 0.765% |
| Epic | 0.3825% |
| Mythic | 0.051% |
The Materials toggle on the Combine tab fuses 5 materials of the same family and rarity into 1 random material of that family, one rarity higher. This always succeeds and only costs a small gold fee: 100 (Common to Rare), 250 (Rare to Epic), 500 (Epic to Mythic). Materials are also fully tradeable on the marketplace - they have their own Materials category with family and rarity filters in both the Buy and Sell tabs.
Durability & Repair
Weapons, armor and shoes now wear down while you wear them - items in your backpack or listed on the market never lose durability. A fresh drop starts at 100%. At 0% the item is Broken: it grants no stats and no rune effects until repaired, but it is never lost and stays equipped. How long a full bar lasts depends on rarity, and every upgrade level adds half a day:
| Rarity | Full bar at +0 | At +9 |
|---|---|---|
| Common | 3 days worn | 7.5 days |
| Rare | 3.5 days worn | 8 days |
| Epic | 4 days worn | 8.5 days |
| Mythic | 5 days worn | 9.5 days |
The Repair tab at the Blacksmith refills durability by shredding materials and spare gear. Repairs only accept inputs of the same rarity as the item or higher, regardless of upgrade level: a Common item takes Common inputs, a Mythic item takes Mythic materials and Mythic gear. Each accepted input adds a fixed amount (anything above 100% is wasted): a material restores 20% (any family works for repairs), a sacrificed weapon, armor or shoes piece restores 50% and is destroyed forever. A full repair is 5 materials, 2 gear pieces, or a mix of both.
Gacha
The gacha rolls a random +0 item for 100 gold or 15 diamonds (or a free spin from the Diamond quest); gold and diamond rolls share the exact same odds. The reward plays as a rolling reel that spins through items and slows to a stop on what you won, then it flies into your backpack. Most rolls are weapon, armor or shoes; rings are a rare gacha outcome (about 2.4% of spins - in the wild they stay a rare drop, and the gacha mirrors that). There is also a small chance to land a hat or clothes skin instead (see below). A Spending $Islands adds +1% skin chance to the next roll.
Salvage
Drowning in spare gear? The Salvage tab turns unwanted equipment straight into hero XP. Multi-select any items you do not want, see the total XP preview, and salvage them in one go. Epic and Mythic pieces can only be salvaged one at a time and are never touched by Salvage all or multi-select, so a stray click can never destroy your best gear (an Epic pays 175 XP, a Mythic 450 XP at +0). The XP scales with rarity and upgrade level: a Common is worth 20 XP at +0, a Rare 60 XP, and every upgrade level adds another big chunk (roughly +50% per level). It permanently destroys the gear, so it is the clean way to clear your backpack and level up at the same time. Equipped items, quest tools (the Diamond Pickaxe) and your pickaxe slot cannot be salvaged.
Spend $Islands
At the Blacksmith you can spend the $Islands token for a one-shot edge on your next roll or forge. Each one is paid straight from your wallet (the same gas-free Solana flow as everything else):
- Gacha boost: your next gacha roll gets a +1% skin chance.
- Forge boost: your next upgrade gets a +5% success chance.
- Forge protect: your next upgrade will not destroy the item if it fails.
Skins
Skins are rare cosmetic items that everyone can see and trade like any other gear. Hat skins sit on your hero's head and grant +30 Strength; clothes skins restyle your hero's outfit and grant +30 Vitality. Both are the gacha skin drop (spending $Islands or a Diamond quest free spin improves the odds, see above), landing as one or the other with equal chance whenever the gacha hits a skin. The skin pool rotates: right now it holds 6 skins - 3 hats (Arcane Wizard Hat, Horned Warhelm, Skull Captain Tricorne) and 3 full character makeovers (Werewolf, Pumpkin Jack, Neon Punk). Once a skin rotates out it never drops again, so every earlier skin is a collector's item you can only pick up on the player market. Boat skins restyle the boat you sail and grant +50 Agility; they now drop only from bosses (world bosses and the raid Troll), which makes them scarce. Auras loop a glow around your hero and grant +30 Strength, +30 Agility and +30 Vitality; they no longer drop anywhere (neither gacha nor boss), so the ones in the world are all there will ever be. Auras you already own still work.
Runes & enchanting
Runes are very rare consumables that add affixes (permanent bonuses) to your gear. They drop from enemy kills (0.16%), gold and diamond mining (0.4%), raid enemies (0.4%), bosses and, very rarely, fishing (about 0.02%), but never from trees. Runes you own appear in a Runes section of your backpack, and you can buy and sell them on the player market.
There are 8 rune types, each with three strengths (common, rare, epic):
| Rune | Effect | Common | Rare | Epic | |
|---|---|---|---|---|---|
| Sharpness | Crit chance (a crit hits for x1.8) | 5% | 8% | 12% |
 | Leeching | Heal for a share of the damage you deal | 4% | 7% | 10% |
 | Bulwark | Less damage taken | 4% | 7% | 10% |
 | Slayer | More damage vs enemies (not nodes) | 6% | 10% | 15% |
 | Mining | More node damage (trees, gold, diamond) | 8% | 12% | 18% |
 | Fortune | Better odds for gear, rare fish and diamonds | 10% | 20% | 30% |
 | Insight | More XP from everything | 5% | 10% | 15% |
 | Swift | More move speed (on top of the Agility cap) | 3% | 5% | 8% |
Enchant
At the Blacksmith, the Enchant tab applies a rune to one gear piece. Each piece holds up to 4 affixes (rings only 2) and at most one of each type (you cannot put two Sharpness on the same piece). The strength tier is rolled when you enchant (epic is rare), and enchanting always succeeds and never breaks the item. The same affix on different pieces adds up, with no cap. Affixes stay on the gear when you sell or trade it and are shown under the item everywhere (backpack, Blacksmith, market, player profiles). Sharpness, Leeching and Slayer only work in combat, never on trees or gold; in a duel only Sharpness and Bulwark count.
Reroll
The Reroll tab re-rolls the tiers (strength) of a piece that already has affixes (weapon, armor or shoes). The affix types stay, only their strengths change, and the result applies immediately and can come out worse. That is the gamble you take chasing all four affixes at epic.
- Each reroll costs 3500 $Islands, paid straight from your wallet.
- You can lock any affix so it keeps its tier, for 5 Shards each, paid on every reroll. At least one affix must stay unlocked.
- New tiers use the same odds as enchanting (about a 5% chance of epic per affix).
Locking each epic as it lands, a fully maxed piece (all four affixes at epic) takes roughly 40 or more rerolls on average, so it is a rare and expensive prestige goal.
Remove affixes
Want a clean slate? The Reroll tab also has a Remove all affixes button. Pick 4 runes to sacrifice (any mix of types, added to a tray just like the Transmute tab), confirm, and every affix comes off the piece at once. You are left with bare gear you can enchant again from scratch. It works on any enchanted weapon, armor or shoes (not skins or special items), and the 4 runes are the only cost, so it doubles as another handy rune sink.
Transmute runes
Sitting on runes you will never use? The Transmute tab at the Blacksmith turns 8 runes (any mix of types) into 1 rune of your choice. Drop eight spare runes into the tray, pick the type you want, and confirm. The strength tier is still rolled later when you enchant, so transmute is about getting the right type, not a guaranteed epic. It is a handy sink for duplicate runes from drops or the player market.
Skill Tomes
Skill Tomes give your hero an active combat skill: equip a tome in your Skill slot and a skill button appears next to your attack button (hotkey Q on desktop). Press it to unleash the skill on nearby enemies, in the overworld and inside both Trials. Each tome is a tradeable item that keeps its level, so a high level tome is a real treasure.
You get your first tome for free: finish the Seer's Rogue Hunt quest and pick one of the seven skills. Already finished that quest before tomes existed? Visit the Seer again, the choice is waiting for you as a one time claim. Want more than one skill? Extra tomes are sold by other players on the player market (filter by Skill).
The seven skills
 Blade Tempest
Slashes the nearest enemy with a chain of blade arcs - each cut lands as three staggered blades with their own damage. If a target dies mid combo, the next cut jumps to the next enemy.
Leveling up adds: More cuts per cast (3 to 7) and a wider reach (2.6 to 4 tiles).
 Infernal Swirl
Sends a growing fire vortex to the nearest enemy. It rages there for 6 seconds and burns everything inside several times per second - staying inside hurts a lot.
Leveling up adds: A bigger vortex (2.8 to 4.5 tiles across).
 Phantom Rush
Dash into the nearest enemy and keep striking it with the full skill damage until it dies - only then the chain jumps to the next target. Dashing to an enemy in the water drops you on the nearest walkable ground instead.
Leveling up adds: More dashes (3 to 9) and longer jumps (9 to 14 tiles per hop).
 Astral Nova
Drops a singularity a few tiles ahead of you. It charges for 1.5 seconds while dragging nearby enemies into it (bosses resist the pull), then detonates for massive area damage.
Leveling up adds: A bigger blast (3.2 to 5.5 tiles radius) with a matching pull range.
 Molten Ground
Cracks the ground beneath nearby enemies into pools of lava that deal damage every second for 6 seconds. Long cooldown, strong payoff against enemies that stay inside.
Leveling up adds: More pools (3 to 7) and bigger ones (1.1 to 1.6 tiles each).
 Storm of Arrows
Fires salvos of energy arrows at the toughest enemy in range - every arrow hit shows its own damage number. Each salvo knocks you back a step, so mind the ledge.
Leveling up adds: More salvos (3 to 6), more arrows per salvo (8 to 24) and longer range (6 to 9 tiles).
 Wisp Barrage
Summons arcane wisps that hunt down different enemies, explode on impact and leave a short burning zone behind.
Leveling up adds: More wisps (4 to 10), longer reach (6 to 10 tiles) and bigger explosions.
Casting & damage
- Every skill has its own cooldown that shrinks as the tome levels (for example Blade Tempest goes from 12 seconds down to 5). If there is no valid target in range, the cast is refused and no cooldown is spent.
- Skill damage scales with your full hit damage (stats, gear, pet, prestige, holder bonus and buffs all count): each target takes 60% of your hit at level 1, growing to 180% at level 100 (zone skills pay it out over their duration and pay a bonus on top for the wait).
- Skills can crit. Every single skill hit rolls against your crit chance from Sharpness runes and pet affixes, for the same x1.8 as regular hits. Skill damage shows as violet numbers, crits as big gold ones.
- The skill button shows the remaining cooldown, sits next to the attack button (same size on phones) and can be moved freely in the HUD editor. A right click on it opens the Skill Tomes manager.
Leveling a tome (level 1 to 100)
Tomes level from 1 to 100 across five ranks: Beginner (1-20), Adventurer (21-40), Veteran (41-60), Master (61-80) and Grandmaster (81-100). Higher level means more damage, shorter cooldowns and the skill specific extras listed above.
- Craft a Skill Tome Manual at Gandalf for 500 gold, 5000 wood and 500 meat. Using a manual opens the Skill Tomes manager, where you pick which tome gains the level and see a preview of what the next level unlocks.
- Own two tomes of the same skill? Absorb the spare one: the target tome gains all of its levels at once. Great use for market finds.
- Tome Transfer: level a tome with tomes of other skills. Open the Skill Tomes manager, hit Transfer on the target tome and select any other skill tomes you own (not equipped). It costs 2,000 $Islands per source level and the target gains 90% of the spent levels, rounded down - a level 100 tome transfers 90 levels for 200,000 $Islands. Source tomes are destroyed for good, levels above the level 100 cap are wasted, and it cannot be undone. Two tomes of the same skill still merge free of charge with Absorb.
- Combat drops a Tattered Manual instead: every enemy kill has a 0.05% chance to drop one, in the overworld and in both Trials alike. World bosses are the best source, with a drop chance based on your damage tier: 2% at Tier 1, 5% at Tier 2, 10% at Tier 3 and 20% at Tier 4. A Tattered Manual works like a crafted manual but only has a 30% chance to succeed - the book is consumed either way. The crafted manual from Gandalf always works.
The Seer & quests
The Seer stands by the central houses, near the Merchant and the Blacksmith. She hands out quests that chain into one another. A quest must be accepted first; while she has something to offer, a hand marker floats above her head. Quest items live in your backpack on their own, you bring them to her to turn them in.
She also runs the daily quest "Island Chores": fully mine 10 gold or diamond nodes, slay 25 enemies and chop 50 trees, all counted from the moment you accept it that day. Turning it in grants a Skin Spin - a roll on the Seer's own outfit wheel with 20 exclusive daily outfits (common to epic) that drop nowhere else and are tradeable on the player market. One accept and one spin per day, resets at midnight UTC.
Quests form a chain: each unlocks the next, and the later ones are level-gated. The shard and diamond quests are repeatable, Mythic Exchange returns every 3 hours, the daily quests reset every day (accept them anew each morning); the rest are one-time. Most quests also pay out a chunk of hero XP. When you have many quests open, the Seer panel scrolls. First Recruit stands apart from the chain as a beginner quest: kill 5 enemies of any kind and pick a free guardian (Warrior, Archer or Monk) plus a bundle of starter tonics; if your guardians are already at cap, the pick is skipped.
| Quest | Unlock | Goal | Reward | XP |
|---|---|---|---|---|
| Shards of the Deep repeatable | - | Bring 5 Void Shards (rare boss drop) | Diamond Pickaxe | - |
| Veins of Ice repeatable | after 1st pickaxe | Bring 150 diamonds | Choose: 5 forge spins + 1 sigil, or 5 sigils + 1 forge spin | - |
| First Recruit | Lv 1 | Kill 5 enemies of any kind | Your pick of a free guardian (Warrior, Archer or Monk) + 3 Scholar Brews + 2 Ironskin Potions + 1 Strength Elixir. At full guardian cap the pick is skipped. | +100 |
| Goblin Cull | Lv 1 | Kill 10 Spear + 10 Torch goblins | Common weapon | +150 |
| Rogue Hunt | Lv 1 | Kill 10 Thieves + 8 Gnolls | Rare armor | +200 |
| Clear the Isle | Lv 1 | Kill 8 Shamans + 8 Pig Riders + 6 Gnomes, gather 50 wood + 50 meat | Rare shoes | +350 |
| Stand Together | Lv 10 | Kill 2 world bosses | 10 gold | +1,200 |
| Hundred Slain | Lv 20 | Kill 100 enemies | 1 diamond + 10 gold + Epic gear | +2,500 |
| Gift of Swiftness | Lv 25 | Hand in 250 gold | +20 Agility (permanent) | +3,000 |
 Champions of the Deep Champions of the Deep | Lv 25 | Help defeat 10 world bosses | 1 War Sigil | +3,000 |
| Strike the Earth | Lv 30 | Fully mine 10 nodes (trees / gold / diamond) | 1 free forge spin | +3,500 |
| Warband | Lv 35 | 3 boss kills + 50 mob kills + 2 raids (4+ players) | 5 Epic gear pieces | +6,000 |
| Deep Delve | Lv 60 | Collect & hand in 100 diamonds | 5 Epic gear pieces + 10 gold | +10,000 |
| Circle of Power repeatable | Lv 20 | Sacrifice 10 rings (any rarity) + 35 runes - you pick which in an inventory picker | A skill tome of your choice - repeatable every 10 levels (once at 20, again at 30, 40, ...) | +1,500 |
 Mythic Exchange Mythic Exchangerepeatable | Lv 25 | Sacrifice 2 Mythic gear pieces (weapon, armor or shoes, any upgrade level, you pick which) | 1 random Mythic material, repeatable every 3 hours | +250 |
| The Lumberjack | Lv 5 | Fell 50 trees | Lumberjack mastery (permanent, level it with wood up to +50% chop damage) | +500 |
| The Prospector | Lv 10 | Fully mine 25 gold or diamond nodes | Prospector mastery (permanent, level it with gold and diamonds up to +20% mining damage) | +500 |
| Daily: War Path repeatable | Lv 15 | Kill 100 enemies + 1 world boss (resets daily) | 1 War Sigil per day | +800 |
| Daily: Night School repeatable | Lv 10 | Chop 50 trees + fully mine 15 nodes + catch 10 fish (resets daily) | 2 Scholar's Brews + 1 Tattered Manual per day | +600 |
 First Blood, First Exit First Blood, First Exit | Lv 20 | Extract successfully from 1 Extraction Run | 3 Tattered Manuals | +800 |
| Serial Extractor | after First Blood | Extract successfully from 3 Extraction Runs | 1 War Sigil (once only) | +1,500 |
| Wave Rider | after First Blood | Extract at wave 8 or later of an Extraction Run | 3 Scholar's Brews | +1,500 |
| Greed Is Good | after First Blood | Extract with 500+ unsecured gold in your run bag | 1 free forge spin (once only) | +2,000 |
| Ghost Protocol | after First Blood | Extract without dying once inside the run | Epic armor | +2,000 |
| Boss Buster | after First Blood | Kill the Extraction Run boss, then still extract | Epic weapon | +3,000 |
| Slayer's Vow | Lv 15 | Kill 300 enemies of any kind | 1 free forge spin (once only) | +3,000 |
 Sole Searcher Sole Searcher | Lv 5 | Deliver 30 Old Shoes (fishing "luck") - consumed on delivery | 1 free forge spin (once only) | +1,000 |
| Beach Brawler | Lv 10 | Win 3 duels against other players | 100 gold (one regular gacha spin on the house) | +800 |
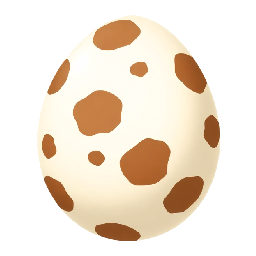 Egg Flip Egg Flip | Lv 10 | Hatch and claim 2 pets from eggs of any tier | 2 Scholar's Brews + 1 Tattered Manual | +1,000 |
| Landlord | Lv 1 | Place 5 Island Pack pieces (beach decorations or the new palms/tropical trees) | 1 Skin Spin | +500 |
| High Roller | Lv 10 | Roll 3 forge gacha spins that come up below Epic | 1 free forge spin (once only) | +500 |
Mira the Alchemist
Mira brews new consumables from your upgrade materials - find her in the NPC row next to the Seer on the main island. Every recipe consumes materials (any of the exact kinds listed), a small gold fee, and often a store-bought potion as the base: you buy the basic elixir at the Merchant and Mira refines it into something stronger. All crafted items are tradeable on the player market, usable from the backpack, and assignable to your quick slots. Active brews show up over your health bar with their real strength and remaining time.
Infusions upgrade the Merchant combat potions in two steps (drink effects replace each other on the same channel, the latest drink wins):
| Brew | Ingredients | Effect |
|---|---|---|
| Steelblood Elixir | Strength Elixir + 3 Copper Ore + 2 Iron Scraps + 1 Blunt Filings + 1 Coal Chunk + 25 gold + 300 meat | +35% damage, 10 min |
| Bulwark Brew | Ironskin Potion + 3 Ragged Hide + 2 Bone Plate + 1 Rusty Chainlinks + 1 Coarse Padding + 25 gold + 300 meat | -40% damage taken, 10 min |
| Galewind Tonic | Swiftness Potion + 3 Frayed Cloth + 2 Soft Feathers + 1 Worn Sole + 1 Canvas Scrap + 25 gold + 300 meat | +28% move speed, 10 min |
| Field Ration | Health Potion (Large) + 2 Boar Leather + 2 Wolf Pelt + 1 Hemp Cord + 25 gold + 300 meat | Fully heals you, your guardians and your pet |
| Titan Draught | Steelblood Elixir + 2 Silver Ore + 1 Steel Ingot + 1 Tempered Rivets + 1 Forge Flux + 75 gold + 900 meat | +45% damage, 15 min |
| Aegis Brew | Bulwark Brew + 2 Hardened Leather + 1 Polished Scale + 1 Silvered Links + 1 Bear Hide + 75 gold + 900 meat | -50% damage taken, 15 min |
| Zephyr Tonic | Galewind Tonic + 2 Woven Wool + 1 Silk Thread + 1 Supple Sole + 75 gold + 900 meat | +35% move speed, 15 min |
Tools and pet snacks:
| Item | Ingredients | Effect |
|---|---|---|
| Whetstone Kit | 2 Rough Whetstone + 1 Bronze Rivets + 1 Tin Ore + 25 gold + 300 meat | +25% gather damage, 10 min |
| Field Repair Kit | 2 Cracked Scale + 1 Leather Laces + 1 Hemp Cord + 25 gold + 300 meat | Restores 15% durability to your most damaged gear piece up to Rare, anywhere |
| Master Repair Kit | Field Repair Kit + 1 Reinforced Heel + 1 Sturdy Padding + 50 gold + 600 meat | Restores 15% durability, any rarity |
Charms (epic materials, effects no potion offers):
| Charm | Ingredients | Effect |
|---|---|---|
| Prospector's Idol | 1 Sunsteel Ore + 1 Drakescale + 1 Windrunner Silk + 125 gold + 1,500 meat | +5% drop chances, 10 min |
| War Banner | 1 Obsidian Chunk + 1 Ironhide Slab + 1 Gale Thread + 125 gold + 1,500 meat | +25% damage AND -25% damage taken, 20 min |
| Emberheart Charm | 1 Dragonfire Coal + 1 Fine Whetstone + 125 gold + 1,500 meat | +10% lifesteal, 15 min |
Mythic brews - each of the six Mythic materials powers its own recipe (250 gold + 3,000 meat fee each, all buffs last 10 minutes):
| Brew | Ingredients | Effect |
|---|---|---|
| Phoenix Tincture | 1 Phoenix Down + 1 Aegis Heart | Death Ward: the next killing blow leaves you at 30% HP instead of dying |
| Voidforged Wrath | 1 Voidforged Core + 1 Obsidian Chunk | +50% damage and +10% lifesteal |
| Celestial Elixir | 1 Celestial Alloy + 1 Starmetal Ingot | +45% damage, -50% damage taken, +35% speed and +10% lifesteal at once |
| Aegis Ward | 1 Aegis Heart + 1 Ironhide Slab + 1 Runed Plating | -60% damage taken |
| Tidewalker Oil | 1 Leviathan Scale + 1 Cloudstep Weave + 1 Featherlight Sole | +50% boat speed |
| Spirit Feast | 1 Cloudstep Weave + 1 Drakescale | +50% pet damage |
The Death Ward deserves its own note: while it is active you carry a light blue charm over your health bar. The next hit that would kill you leaves you at 30% HP instead - the screen flashes light blue and shakes when it saves you. It works in the open world, all raids (including the Abyssal Trials) and Extraction Runs, but never in duels. Only one ward can be active at a time and it is consumed on use.
Leaderboard
Open the Leaderboard from your hero panel (the Leaderboard button sits next to Quests). It ranks every named player in the world, so you do not need to be online to show up. Drag a corner to resize it and press Esc to close.
Pick a time window at the top: Daily, Weekly or All Time. Daily resets every midnight and Weekly every Monday (server time); a live countdown shows how long is left. All Time keeps the full history. Your own row is highlighted, even when you sit below the top 25.
The ranks are grouped into categories:
- Combat: Enemies Slain, Bosses Slain, Raids Cleared, Extractions, Items Extracted, Duel Wins
- Gathering: Gold, Wood and Meat farmed, Diamonds Mined, Nodes Harvested, Market Sales, Gear Dropped
- Progress: Total XP
- Forge: Forge Upgrades, Gacha Spins, Items Salvaged, Tokens Spent, Highest Forge. Tokens Spent counts every $Islands token you spend in game: forge boosts, the gacha, forge protects, affix rerolls, hatch speedups, premium emotes and instance revives
- Land & Social: Land Owned, Login Streak, Referrals, Referral Earnings. Referrals counts the players you recruited through the referral program (Daily and Weekly count fresh sign-ups in that window), Referral Earnings ranks the USDC commissions paid out to you. Both are display-only boards and carry no weekly prizes
Click any name to open that player's profile: their level, kills per enemy type, which bosses they have slain, raids won and the gear they have equipped.
We run giveaways from the Daily and Weekly boards, so every fresh window is a new chance for everyone. The final standing of each day and week is saved the moment it resets.
Weekly rewards (automatic)
Every week the top 3 of thirteen Weekly boards are rewarded automatically shortly after the Monday reset. Prizes land directly in your inventory - you do not need to be online. Staff wallets are excluded; Market Sales and Gacha Spins carry no prizes.
Free Spins are standard: every rank on every rewarded board includes forge free spins on top of its main prize - 3 for 1st, 2 for 2nd, 1 for 3rd. Tokens Spent is the spin board and pays a double set (6/4/2).
| Weekly board | 1st (+3 Free Spins) | 2nd (+2) | 3rd (+1) |
|---|---|---|---|
| Enemies Slain | 2 Skill Books | 1 Skill Book | 1 Skill Book |
| Bosses Slain | 1 Tier 3 Egg | 45 Diamonds | 25 Diamonds |
| Raids Cleared | 500 Gold | 250 Gold | 125 Gold |
| Extractions | 500 Gold | 250 Gold | 125 Gold |
| Total XP | 2 Skill Books | 1 Skill Book | 1 Skill Book |
| Diamonds Mined | 60 Diamonds | 35 Diamonds | 25 Diamonds |
| Gold Farmed | 750 Gold | 400 Gold | 200 Gold |
| Fish Caught | 1 Fish Manual | 1 Fish Manual | 250 Gold |
| Duel Wins | 3 Skin Spins | 2 Skin Spins | 1 Skin Spin |
| Tokens Spent | 1 Skin Spin + 6 Free Spins | 4 Free Spins | 2 Free Spins |
| Highest Forge | 400 Gold | 200 Gold | 100 Gold |
| Forge Upgrades | 500 Gold | 250 Gold | 125 Gold |
| Items Salvaged | 5 Void Shards | 3 Void Shards | 1 Void Shard |
The Mystic (Gandalf)
Gandalf stands a few tiles from Warmaster Bram. He deals in two rare services that let you reshape your hero. Buy his items from his panel, then use them from your backpack.
The Tome of Reflection is the way to rebuild your stat spread from scratch; Awakening Stones let dedicated heroes push past the normal stat cap of 130, one point at a time, all the way to 200.
Death & healing
- Healing: your self heal restores +25% max HP for 3 meat (short cooldown). It sits on quick slot 1 by default, so press 1 or tap the slot. Move it to another slot or swap in a potion any time. The merchant's health potions heal instantly too (see Merchant & potions).
- Death: you lose a random 0 to 10% of your current level's XP span. You never drop below the level threshold. Respawn with a click; leveling up also fully heals you.
Hiring guardians
Guardians are NPC fighters that belong to you, not to an island. Hire them in the hero panel, no island required:
Guardians can be named (2 to 16 characters). The name shows above their head for you.
Companions vs. island guards
- Companions follow your hero in formation, even across water, each in their own boat. Your companion slots grow with your level: 2 plus 1 per 15 levels (max 5). Companions pause safely while you are offline. Kills by your companions grant you 25% of the enemy's XP, as long as you are actively playing (moved or fought in the last 90 seconds).
- Island guards are stationed on one of your islands and patrol 24/7, even while you are offline. The guard cap scales with island size, from 2 up to 10. Recall them to your side any time.
Guardians can be attacked by enemies. If one falls, revive costs 50 meat (fully healed). You can also heal a wounded guardian for 5 meat (+25% HP) in the hero panel.
Feeding & leveling guardians
Feed a guardian resources to raise its level, up to level 10. Each feeding costs the hire price × current level (so warrior level 3 → 4 costs 150 meat, 90 gold, 30 wood) and grants per level:
- +25% of base HP (the HP gain is healed immediately)
- +15% of base damage
- Monks heal 2 percentage points more per level (15% → 33% at level 10)
Pets
Pets are combat companions that hatch from eggs. Equip one in the dedicated Pet slot in your Equipment panel and it fights beside you, on land and at sea, against enemies, world bosses, the Kraken and raid bosses alike.
Getting an egg
Eggs come in four tiers (a higher tier means a stronger pet) and drop from two sources:
- Any enemy kill: a small 0.3% chance. The tier depends on that island's own level: below level 5 it's always Tier 1, from level 5 it splits 70% Tier 1 / 30% Tier 2, and from level 25 it splits 66% Tier 1 / 30% Tier 2 / 4% Tier 3. Tier 4 never drops this way.
- Bosses (world bosses, the Kraken, raid bosses like the Troll): only at damage Tier 4 (30%+ of the boss's health, see Drop rates), a rare 0.005% chance of a Tier 4 egg, the strongest kind. Regular raid enemies never drop eggs, only the raid boss can. In the Shallow Trials the same roll gives a Tier 3 egg instead; a Tier 4 egg never drops there.
Sitting on a pile of low eggs? Open the Pets panel and fuse three eggs of the same tier for a 20% chance to combine them into one egg of the next tier up (fails keep nothing; fusing tops out at Tier 3, a Tier 4 egg is boss loot only).
Eggs are tradeable on the player market like any other item.
Hatching Field
Build a Hatching Field from the Resources palette (200 diamond, one per island). It holds up to 5 eggs at once, from any player. Your own eggs incubate for free; visitors pay you 100 gold per egg they place, and only they can claim what hatches from it.
| Egg tier | Hatch time |
|---|---|
| Tier 1 | 2 hours |
| Tier 2 | 6 hours |
| Tier 3 | 12 hours |
| Tier 4 | 24 hours |
The timer keeps running while you're offline. Once it's ready, claim your pet: the species is a random surprise among all seven below, the egg's tier only decides how strong its base stats are. In a hurry? Spend 10,000 $Islands to instantly halve a slot's remaining time, up to twice per egg.
The seven species
 Signature: Sharpness

 Signature: Leeching
 Signature: Bulwark
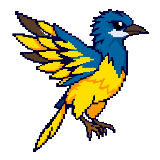
 Signature: Slayer

 Signature: Leeching

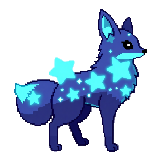 Signature: Insight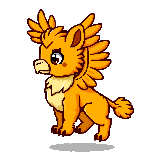
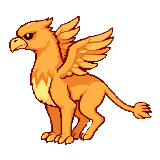
 Signature: Fortune
Baby, Juvenile and Adult are the same pet at different levels, not separate catches. Every pet rolls 1 affix (2 for a Tier 4 egg); each has roughly a 50% chance of being its signature affix above, otherwise a different one (Swift never appears on pets, see Runes for what each affix does). Affix strength scales with the pet's level instead of a fixed rune tier, and it gains a bonus extra affix when it evolves at level 11 and 21.
Leveling & evolving
A pet levels from 1 to 30, evolving from Baby to Juvenile at level 11 and to Adult at level 21. Each level costs Gold, Diamond and Meat, or Fish instead of Meat for the Octopus, and the price climbs fast, then jumps again at each evolution. Leveling now scales with your pet's tier: lower tier pets are much cheaper to raise. The table shows the full Tier 4 price:
| Stage | Gold | Meat / Fish | Diamond |
|---|---|---|---|
| Baby (1 to 10) | 260 to 2,600 | 80 to 800 | 1 to 5 |
| Juvenile (11 to 20) | 6,600 to 12,000 | 1,100 to 2,000 | 10 to 100 |
| Adult (21 to 29) | 25,200 to 34,800 | 2,730 to 3,770 | 165 to 285 |
Lower tiers pay only a fraction of that, matching their weaker stats: a Tier 1 pet pays 30%, Tier 2 pays 60% and Tier 3 pays 80% of every cost above; only a Tier 4 pays the full price. Raising a Tier 1 all the way to level 30 now costs about 113,000 gold instead of 377,000. Level 30 is the cap, no further cost beyond that.
Fusing pets
Ended up with a shelf of spare pets you never equip? Open the Fuse tab in the Pets panel and sacrifice three unequipped pets of the same tier (works for every tier, Tier 1 to Tier 4) to roll one brand-new pet of that same tier. Its species and affixes are rolled fresh, so this is how you chase a species or a signature affix you want on a tier you already have spares of. Pick the three by tapping their portraits; your currently equipped pet is always protected and can never be fed in by accident. This is different from fusing eggs above: fusing eggs trades three eggs up one tier, while fusing pets keeps the tier and re-rolls the hatched pet itself.
The result does not start at level 1. It starts at the rounded-up average level of the three pets you sacrificed (capped at 30) and pulls in the evolution affixes it would have earned on the way up, so fusing higher-level pets gives you a strong pet right away. A green Lv X preview appears next to the result tile the moment you've picked three, so you always see the level you'll get before you commit. Fusing costs nothing but the three pets themselves, no gold or diamond on top.
Naming your pet
Give any pet a custom name (2 to 16 letters, numbers or spaces) from the Pets panel. The name floats above the pet in the world on a little nameplate, replaces the default "Adult Dragon" style label across the panels, and is shown when other players inspect you. It survives evolutions, so a pet you name as a Baby keeps that name all the way to Adult. Clear the field to fall back to the default name.
Tier 4 pets also carry a soft pulsing glow around their silhouette out in the world, so your rarest companion stands out at a glance.
Combat, energy & revive
- An equipped pet fights on its own, and any hits it lands count toward your own boss damage share (see Drop rates). It doesn't shield you, you always take the same damage as normal, but it also takes a share of any hit that lands on you (35%) to its own separate HP, so it can go down fighting right alongside you.
- Knocked out: at 0 HP your pet is down for about a minute before it gets back up on its own. Revive costs 300 meat if it's fully KO'd, or less if it's merely wounded, scaled to the missing HP.
- Energy: drains fully over roughly 4 days. Feed it eggs in the Pets panel to top it back up, every tier restores the same amount so it's cheapest to sacrifice Tier 1 eggs; two eggs bring it back to full. At 0 energy your pet falls asleep and stops fighting until fed again.
- Swap lock: you can't equip or unequip your pet for 5 seconds after fighting or getting hit, so you can't swap in a fresh one mid-fight as a free shield.
Holding $Islands
On top of the general holder bonus (see Levels & stats), holding $Islands also strengthens your pet: its Strength, Agility and Vitality contribution to you gets +5% for every 100,000 $Islands you hold, up to +100% at 2,000,000.
Pets, like any gear, can be bought and sold on the player market.
Emotes
Emotes are quick animated reactions that pop up over your hero so you can say hi, celebrate or taunt without typing. Tap the emote button, pick one, and everyone nearby sees it. A short cooldown (about 3 seconds) keeps it from being spammed.
Free for everyone: 


Holder emotes unlock automatically while you hold $Islands (nothing to spend; they lock again if you drop below the amount):

 hold 50,000 $Islands

 hold 250,000 $Islands
 hold 1,000,000 $Islands
Premium emotes are unlocked once by spending 2,500 $Islands each and are yours
forever, even if you later sell your tokens: 


Some emotes come with extra flair: sparkles, a heal shimmer or a small screen shake.
Player duels
Challenge another player to a friendly duel: tap them, open their profile and pick Duel. It is purely for fun, with no stake. As the challenger you also decide whether pets are allowed - after pressing Duel a banner lets you pick With pets or Without pets; the rule applies to both fighters and is shown on the invite. The other player has 20 seconds to accept. You cannot start a duel while either player is inside a raid, an Extraction Run, or a boat race (including an open race lobby).
When both are ready you get a GO, then you fight on the spot: trade hits until one of you is knocked out. First knockout wins; if nobody falls within 90 seconds it is a draw, and leaving the game counts as a forfeit. A knockout is harmless: the loser goes down for a moment and respawns automatically about 2.5 seconds later.
All Skill Tome skills work against your opponent with their full effects, and every hit shows a floating damage number (crits in gold). A live banner at the top tracks both HP bars and the running damage totals, and after the fight both players get a fight summary: damage dealt and taken, auto attack vs skill damage, hits, crits, biggest hit and casts per skill.
To keep duels fair, healing is fully disabled while the duel runs: the heal button, pet healing and all consumables (including buff potions) are locked, though buffs you drank before the duel keep working. Your follow guardians take a nap for the duration and return right after. With pets allowed your equipped pet soaks part of the incoming damage as usual; without pets it stays out of the fight entirely. In a duel only the Sharpness and Bulwark affixes count, so duels reward skill and positioning over piled on gear bonuses. You also cannot teleport home while a duel is running.
Photo mode & blocking
Photo mode hides the interface and freezes the action so you can frame a clean shot of your island (or anyone else's) and save the picture. Open it from the island view, then close it to go back to playing.
Blocking: if a player is bothering you, tap them, open their profile and pick Block. Blocking hides their chat from you, and you can unblock them again from the same place. It only changes what you see; it never affects the game for them.
USDC payments
Land purchases and market buys are real USDC payments on Solana mainnet, built on the open x402 payment standard:
- You confirm a purchase and the server answers with an exact payment request.
- Your wallet shows one USDC transfer with the exact amount and purpose. Nothing moves without your signature.
- The payment facilitator covers the Solana network fee. You only need USDC, no SOL.
- The server verifies and settles the transfer on-chain, then delivers instantly (your parcel or the items). Every payment is recorded with its on-chain signature.
- The game checks your USDC balance first, so there is no wallet popup for hopeless buys.
- Prices are always computed server-side; the client cannot manipulate them.
- A market listing is locked before any money moves. Two buyers can never both pay.
Wallet & session security
- Logging in means signing a message, never a transaction. It costs nothing and cannot move funds.
- Continue playing only works when the wallet in your extension is exactly the session wallet. If you switch accounts, the old session is dropped immediately and you reconnect with the new wallet. Nobody can build on land that is not theirs.
- Switching or disconnecting the wallet in your extension logs you out instantly, even mid-game.
- Only one session per wallet is online at a time.
- All ownership and money logic runs server-side: land writes are owner-checked, prices are server-computed, and payments settle on-chain before anything is delivered.
- You can end your session any time via Settings → Log out.